If Wacom's ever-increasing array of consumer-oriented tablets is any indicator, it's not just professionals who are looking to get their fingers wet with some pixel paint—and not everyone can afford Painter, Corel's undisputed champion of natural media painting.
Ambient Design's ArtRage has built up a reputation as an inexpensive Painter alternative, and it has a loyal following of artists who are producing some very good work. As someone who has used ArtRage for a few projects, I wanted to write this review to help people cut through the "Better than Painter!" Internet chatter, understand this app's strengths and weaknesses, and determine if it's right for your project. I'll also compare ArtRage Studio Pro to other applications that cover similar ground.
ArtRage Studio Pro vs. ArtRage Studio
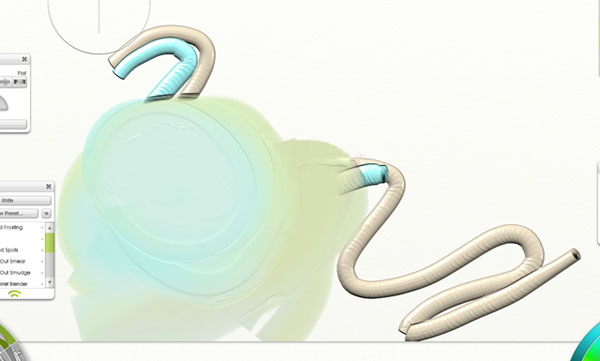
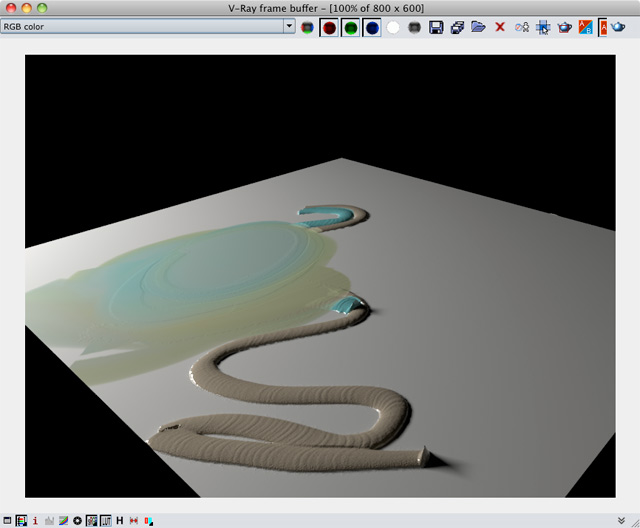
ArtRage Studio comes in two editions: the $40 ArtRage Studio and the $80 ArtRage Studio Pro, both available for Mac and Windows. The cheaper package contains many of the tools found in the bigger package (the full comparison chart is here), but the major selling points for the Pro version are a text tool's per-character formatting, more advanced color blending, Photoshop filter support, and more color and layer options. It also boasts a cool 3D channel export feature that exports your painted image as a 3D-renderer compatible stroke:
In my testing, Photoshop filter support turned out to be pretty weak, with many of my filters not showing up, crashing ArtRage, or just failing altogether. I knew not to try 64-bit Photoshop CS5 filters, but older 32-bit Intel ones mostly failed as well (the India Ink plug-in was the only one I got working).
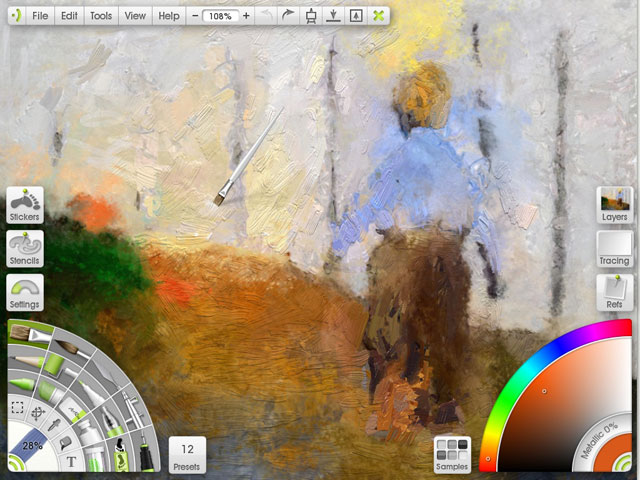
The interface
ArtRage definitely rolls on the cuter side of interfaces. As I mentioned in the Photoshop Elements portion of my Pixelmator review, hobbyist apps sometimes look a bit kitschy for my taste. ArtRage treads this line well enough—it's cute enough to appeal to my six-year-old niece but space-efficient enough to avoid getting in my way or getting bogged down by frills.
The default green highlights can be changed, but you're not going to get it looking as sleek as something like Autodesk's Sketchbook Express/Pro. The interface works well on both my 1400x900 MacBook Pro screen and my dual 1920x1200 screen Mac Pro, letting me drag palettes to separate screens outside its workspace. The larger palettes are also collapsible:
The tool panels can be scaled but the text gets so soft that even at 80 percent it's just hard on the eyes. I'm not sure why there are even options for anything smaller than 50 percent because it just obliterates everything, even at that scale:
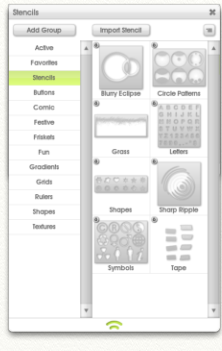
For users who won't want the cheekier effects like Stencils and Stickers, these "Pod" modules can be disabled in the View preferences.
For working quickly, there's a shift modifier for brush size so you don't have to use the brush size widget at the bottom of the screen, or you can use the [ ] hotkeys to increase the size in increments. You can rotate and scale the canvas with alt-right click and shift-right click. It's a bit pokey but it works well and you can quickly reset the paper scale and rotation by hitting the D key. ArtRage has a well-honed workspace and if you don't like the default key setup (I'm looking at you, command Y for redo on OS X), every command can have a custom key binding.
Tools and brushes
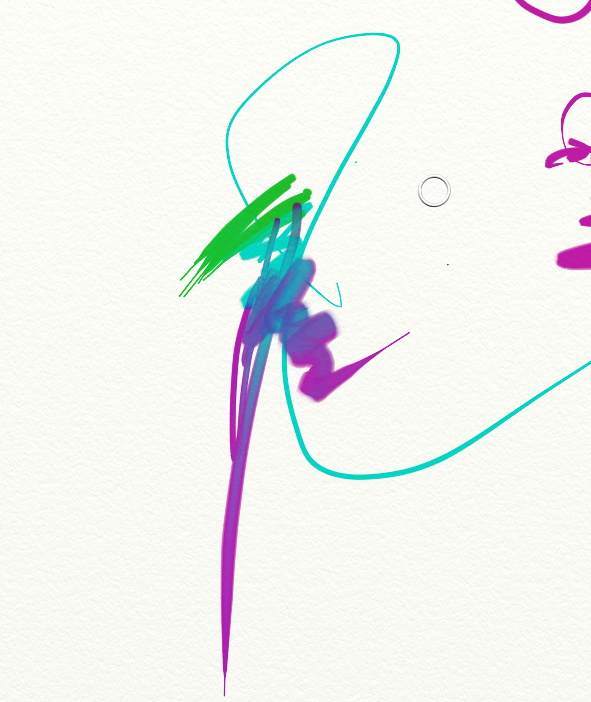
The brush palette holds the standard roster of brushes, pens, and pencils, with a few frill effects for playing around. There are no pastel, conté, or charcoal brushes, but a customized graphite with wide diameter should fill in fine for most needs. The airbrush, graphite pencils, eraser, crayons and pens behave pretty much as expected and have a very good cross section of installed presets. The felt tip pen has a blending marker art pen preset that's begging to be used in Syd Mead-style product sketch:
Although there aren't a ton of tools when compared to Painter, the ones that exist behave just as you'd expect them to. While the results of tricky operations like eraser on oil paint aren't realistic—since people want to erase what's there, not mash oil around with an eraser—the pens, pencils and crayons are very convincing when mixed.

For more drafting-type drawing, you can make straight lines by holding the command key before dragging and adding shift constrains it to 15° angles relative to your canvas (not the view). The canvas can be rotated quickly by holding option and right-clicking. This is important for speedy matte painting, since drawing straight lines can be awkward at angles that don't flow with your wrist motion. But drafting is one weak point of the program, so read the comparison to other apps further on where I cover the better drafting illustration apps.
Another weak point is tablet support: all tools have limited tablet support of one kind or another but no custom control over tilt, minimum pressure, or other important brush modifiers for tablet painting. But technical details aside, everything just feels great as you use the tools, and ArtRage really captures the essence of sketching. Good engineering clearly exists behind the cutesy interface.
The paints
ArtRage has only a few ways to paint, but what's there is done well enough to satisfy most needs. There's the oil brush with it's dynamic viscosity, thinness and loading options:
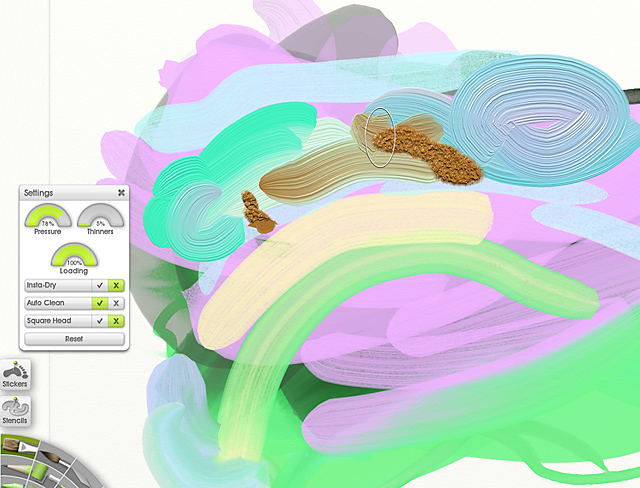
As you can tell from that image, ArtRage is quite good at creating the feel of mixing oil paint with varying amounts of turpentine, and its handling of straight-out-of-the-tube impasto painting and palette knife mixing really has to be seen in action to be appreciated:
Accurate mixing of complements shows that ArtRage is doing the right math when mixing colors.
The Z-depth and wetness in ArtRage is really fun to play with, and while not all medias mix in physically plausible ways, you'll be happy with the subtlety the program can achieve when just working in oils, which can retain their wetness, then reduce as paint spreads out. The only downer to the oil painting is the lack of types of brushes and tips. Your only options are either a hard, square head brush that has a bristly start or a filbert that always starts with a point.
Watercolors
Watercolor results are pretty convincing. Coupled with the tracing features and presets, you can achieve subtle effects that definitely feel like the real thing:
I can see recommending this to my mother, who has wanted to learn watercolors, a medium that is notoriously difficult to learn and expensive to maintain. She would have more fun loading up a tracing image of flowers while getting better results than she could with little watercolor training—not everyone is looking to develop hardened art skills and ArtRage has these users well covered.
To calculate her media cost, she could use a simple equation: everything multiplied by zero. My only complaint about the watercolor is that the edges can have a very digital feel since no oversampling or smoothing is done:
You can use ArtRage's blur filter to reduce that harshness but there's no way to just select or anti-alias the edges, so the filter softens the whole image.
Still, given that watercolor is a complex mix of the paper surface, wetness and brush pressure, it's a minor complaint and the responsiveness of the brushes should be put first. Maybe once ArtRage introduces CPU multithreading, à la Painter 12, we will see improvements to brush complexity while not sacrificing the current snappy speed.
reader comments
49