Onigiri are a tasty and nutritious snack made with sushi rice, filled with a delicious tuna mayo filling, and wrapped in crispy seaweed. Make these delightful rice balls at home for the perfect snack or light meal. Recipe with step-by-step photos.
Onigiri
Step aside soggy sandwiches … the ultimate portable snack right now is Onigiri. On those days when I need to pack lunch for my kids, I like to make Onigiri because they are healthy and nutritious, they travel well in lunchboxes, plus my kids really love them!
It makes me so proud that my kids are happy to eat foods like sushi or Onigiri at school, because I certainly did not have their confidence at the same age when it came to accepting my cultural heritage.
As a daughter of Vietnamese immigrants in Australia, my lunchboxes often featured leftovers from the previous night’s dinner, usually rice with a pungent stir-fry which would often elicit scrunched noses from the cheese-and-vegemite-sandwich crowd. I am rather astonished by how times have changed, that diversity is now widely embraced and that Asian cuisine has become so hip and popular.
My kids have often asked me to pack them Onigiri or similar rice balls for their packed lunches, sometimes for them to share with their friends on the playground, and I am only too happy to accommodate such requests.
What is Onigiri?
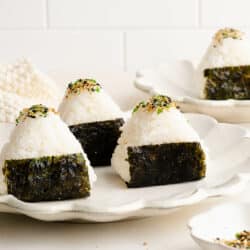
Onigiri are Japanese rice balls or rice triangles which are made from sushi rice and formed into triangular shapes. They are typically filled with cooked salmon, tuna mayo, or anything similarly salty and savoury to work with the sticky sushi rice.
Unlike sushi, Onigiri is eaten as is, i.e. without any soy sauce or wasabi (although my kids drizzle soy sauce on everything anyway!).
In Japan, Onigiri are sold at convenience stores and supermarkets in the same way that you might find sandwiches in other countries. They are typically sold wrapped in a specially-designed plastic wrapper which keeps the seaweed separate from the rice ball, ensuring that the seaweed remains crisp up until the moment you are ready to eat.
Onigiri Recipe
My recipe below is for a Tuna Onigiri, but once you get started, you will see that the types of fillings are endless and easily customisable.
Onigiri Fillings
Some of my favourite Onigiri fillings include:
- Tuna with mayonnaise. See recipe below 🙂
- Baked teriyaki salmon. Brush some teriyaki sauce onto a piece of skinless salmon fillet, and bake at 210°C for about 20 minutes, or until the salmon is cooked through and caramelised.
- Teriyaki Chicken. Finely chop up leftover Teriyaki Chicken.
- Mashed avocado
- Sliced omelette. Cook a thin omelette, roll it into a log, then slice thin strips.
- Chopped broccoli. Steam or boil some broccoli, then finely chop the broccoli so they are as small as the rice grains. Mix the chopped broccoli through the hot sushi rice. My kids love this version.
- Furikake. Furikake is a Japanese seasoning consisting of sesame seeds, seaweed, salt and various other umami-packed ingredients. Furikake is typically used to season rice in Japanese cuisine (you sprinkle it over the rice at the table), and there are endless varieties of furikake to choose from. My favourite blend contains shiso leaves and/or yuzu. Simply mix as much, or as little, as you like through the hot sushi rice.
Onigiri Moulds
If you plan to make Onigiri for the family or a gathering, I recommend buying a special Onigiri mould for the task. I have a mould which makes 6 Onigiri at a time, which speeds up the task considerably. It also happens to be a good way to transport multiple Onigiri for parties or picnics.
You can also buy individual Onigiri moulds to make them one at a time.
Whatever Onigiri mould you buy, take note that they come in various sizes. I prefer to make smaller Onigiri because they look more appetising, but the larger Onigiri are more practical for packed lunches.
Making Onigiri Without Moulds
If you don’t have an Onigiri mould, you can easily mould the rice balls by simply using your hands (make sure you wet them first), or with a sheet of plastic wrap. The latter is more ideal because the sushi rice is quite sticky.
How to Make Onigiri
Step 1
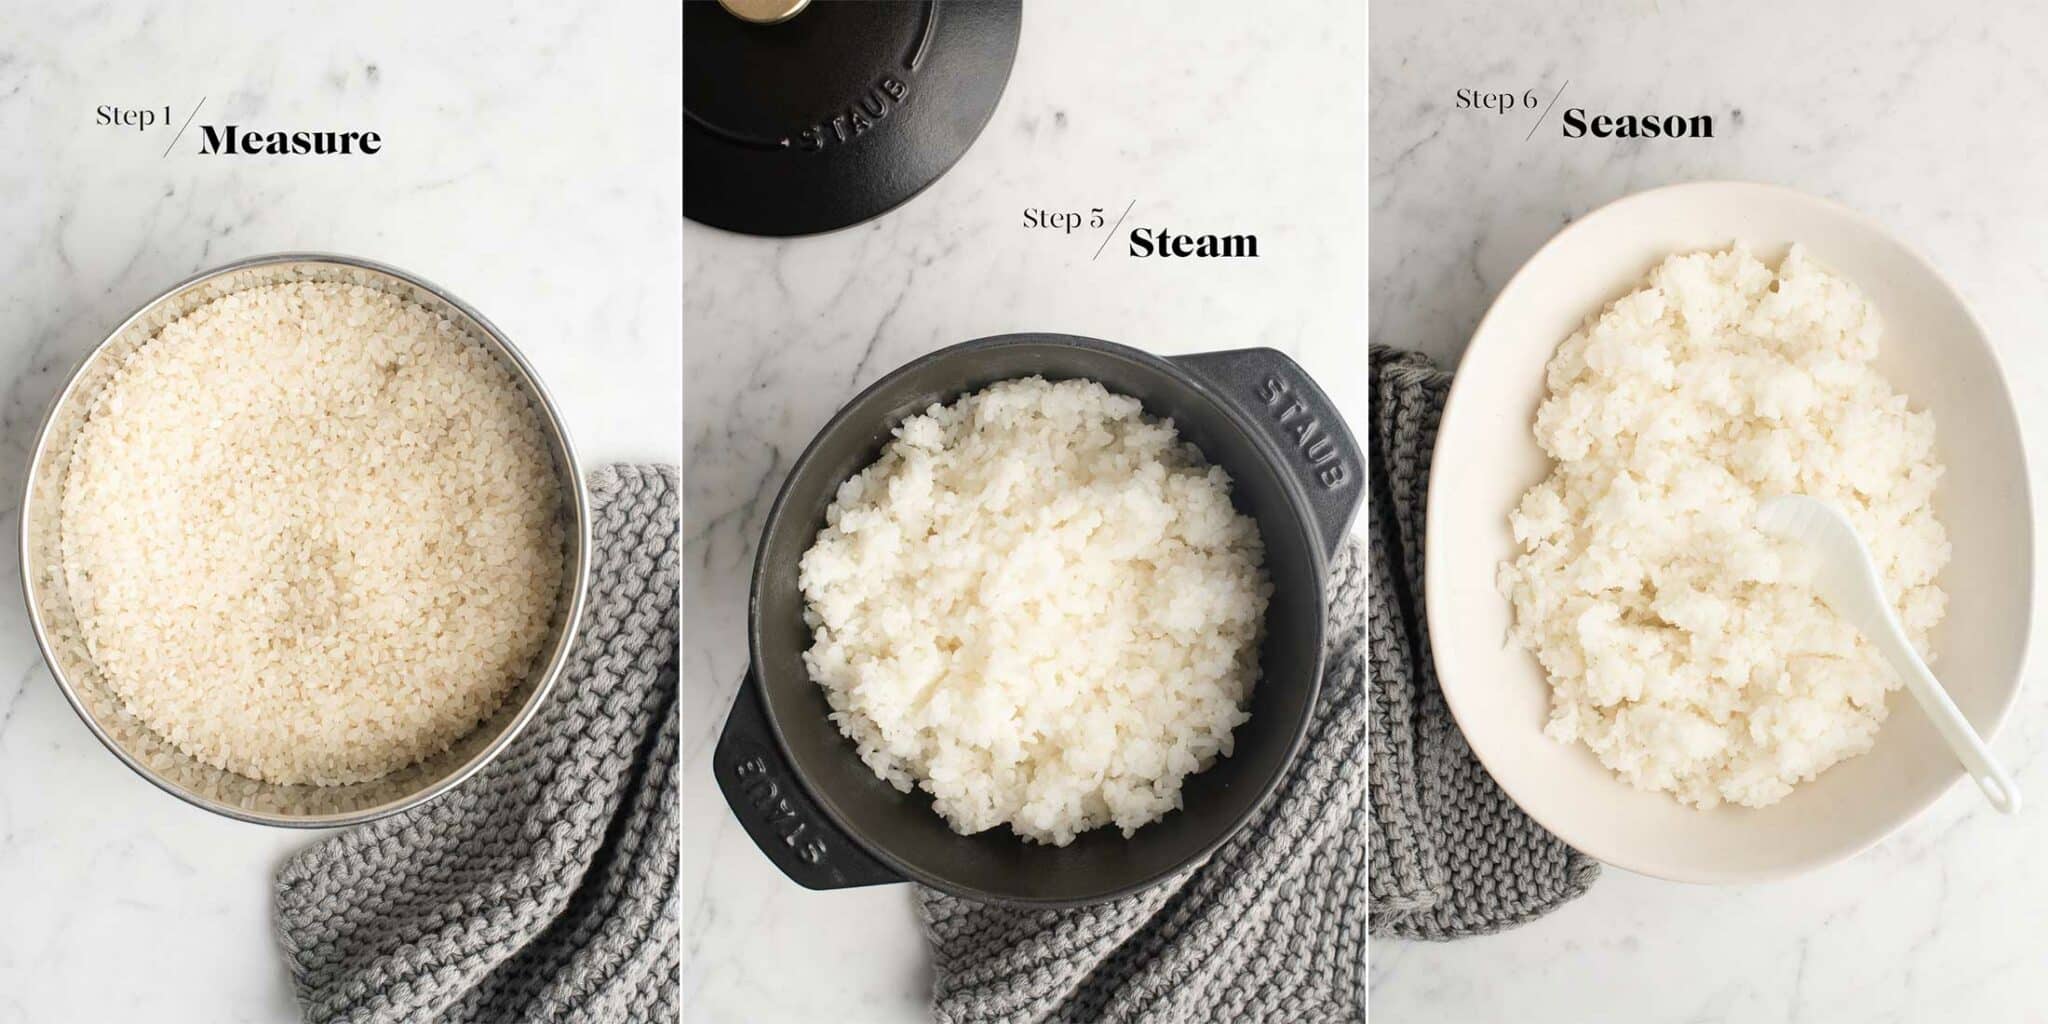
Making any type of sushi starts with making sushi rice.
When making Onigiri, I do recommend using proper sushi rice, which is either labelled as Japanese short-grain rice, Koshihikari rice, or simply sushi rice. This type of rice grain produces a sticky rice which you need in order to mould and for it to hold its shape.
Cook the sushi rice according to the packet instructions, or please see my recipe for How to Cook Sushi Rice.
Once the rice has finished cooking and steaming, spoon the rice onto a large baking sheet. Add the rice vinegar, sugar and salt. If you don’t like seasoned rice, you can keep it plain. However, the salt and vinegar act as preservatives, which will help to keep the rice from spoiling if it is kept out of the fridge for a few hours, e.g. in a lunchbox. The vinegar also helps to keep the rice moister for longer.
Use a rice paddle or spatula to mix everything together, and to eventually spread the rice in a thin layer all over the baking sheet to help it cool quickly.
Step 2
While the rice is cooling, prepare your filling. Drain the canned tuna and place it into a medium-sized mixing bowl. Add the remaining ingredients and mix everything together. Taste for seasoning.
Step 3
Once the rice is cool enough to touch, you can start assembling the Onigiri.
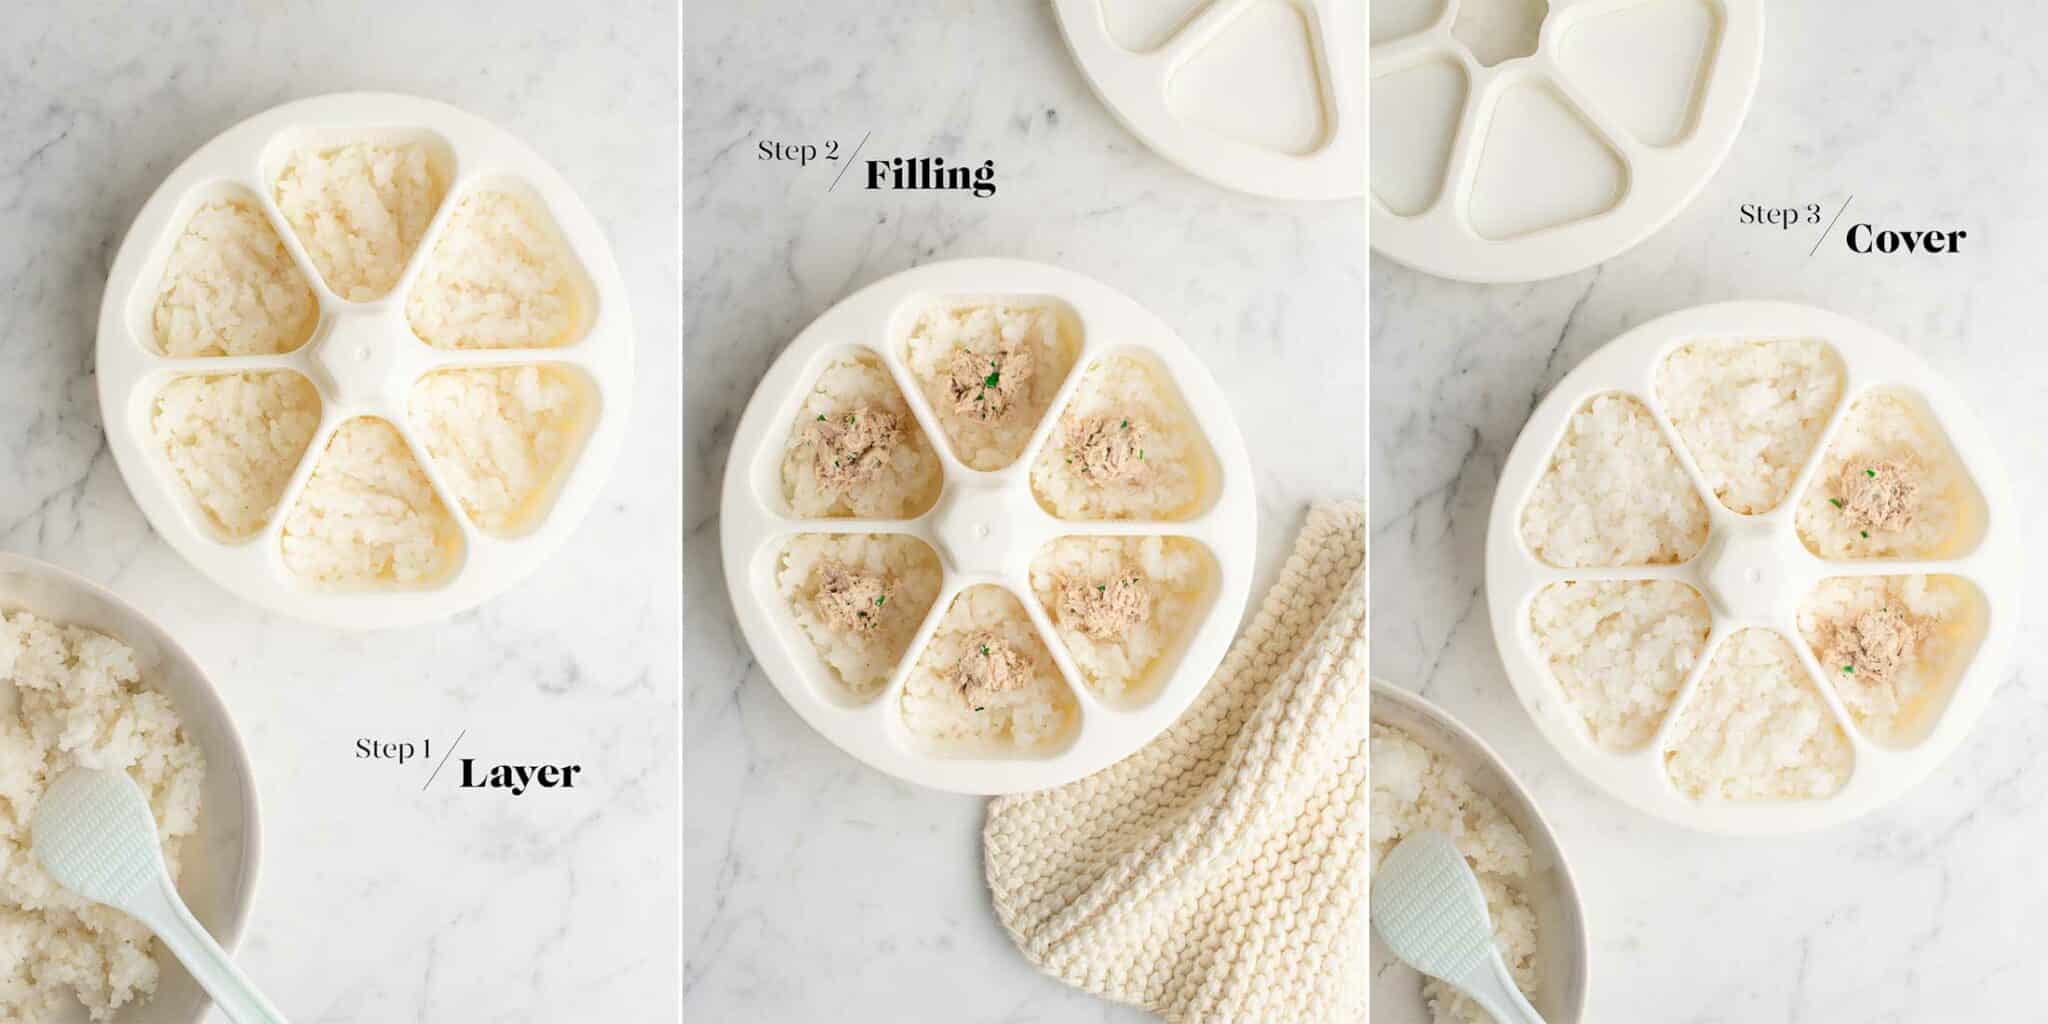
Place enough rice in the Onigiri mould to come about halfway up the mould.
Add some filling in the middle of the rice.
Cover the filling with enough rice to completely fill the mould.
Press the lid on the mould and remove the Onigiri from the mould.
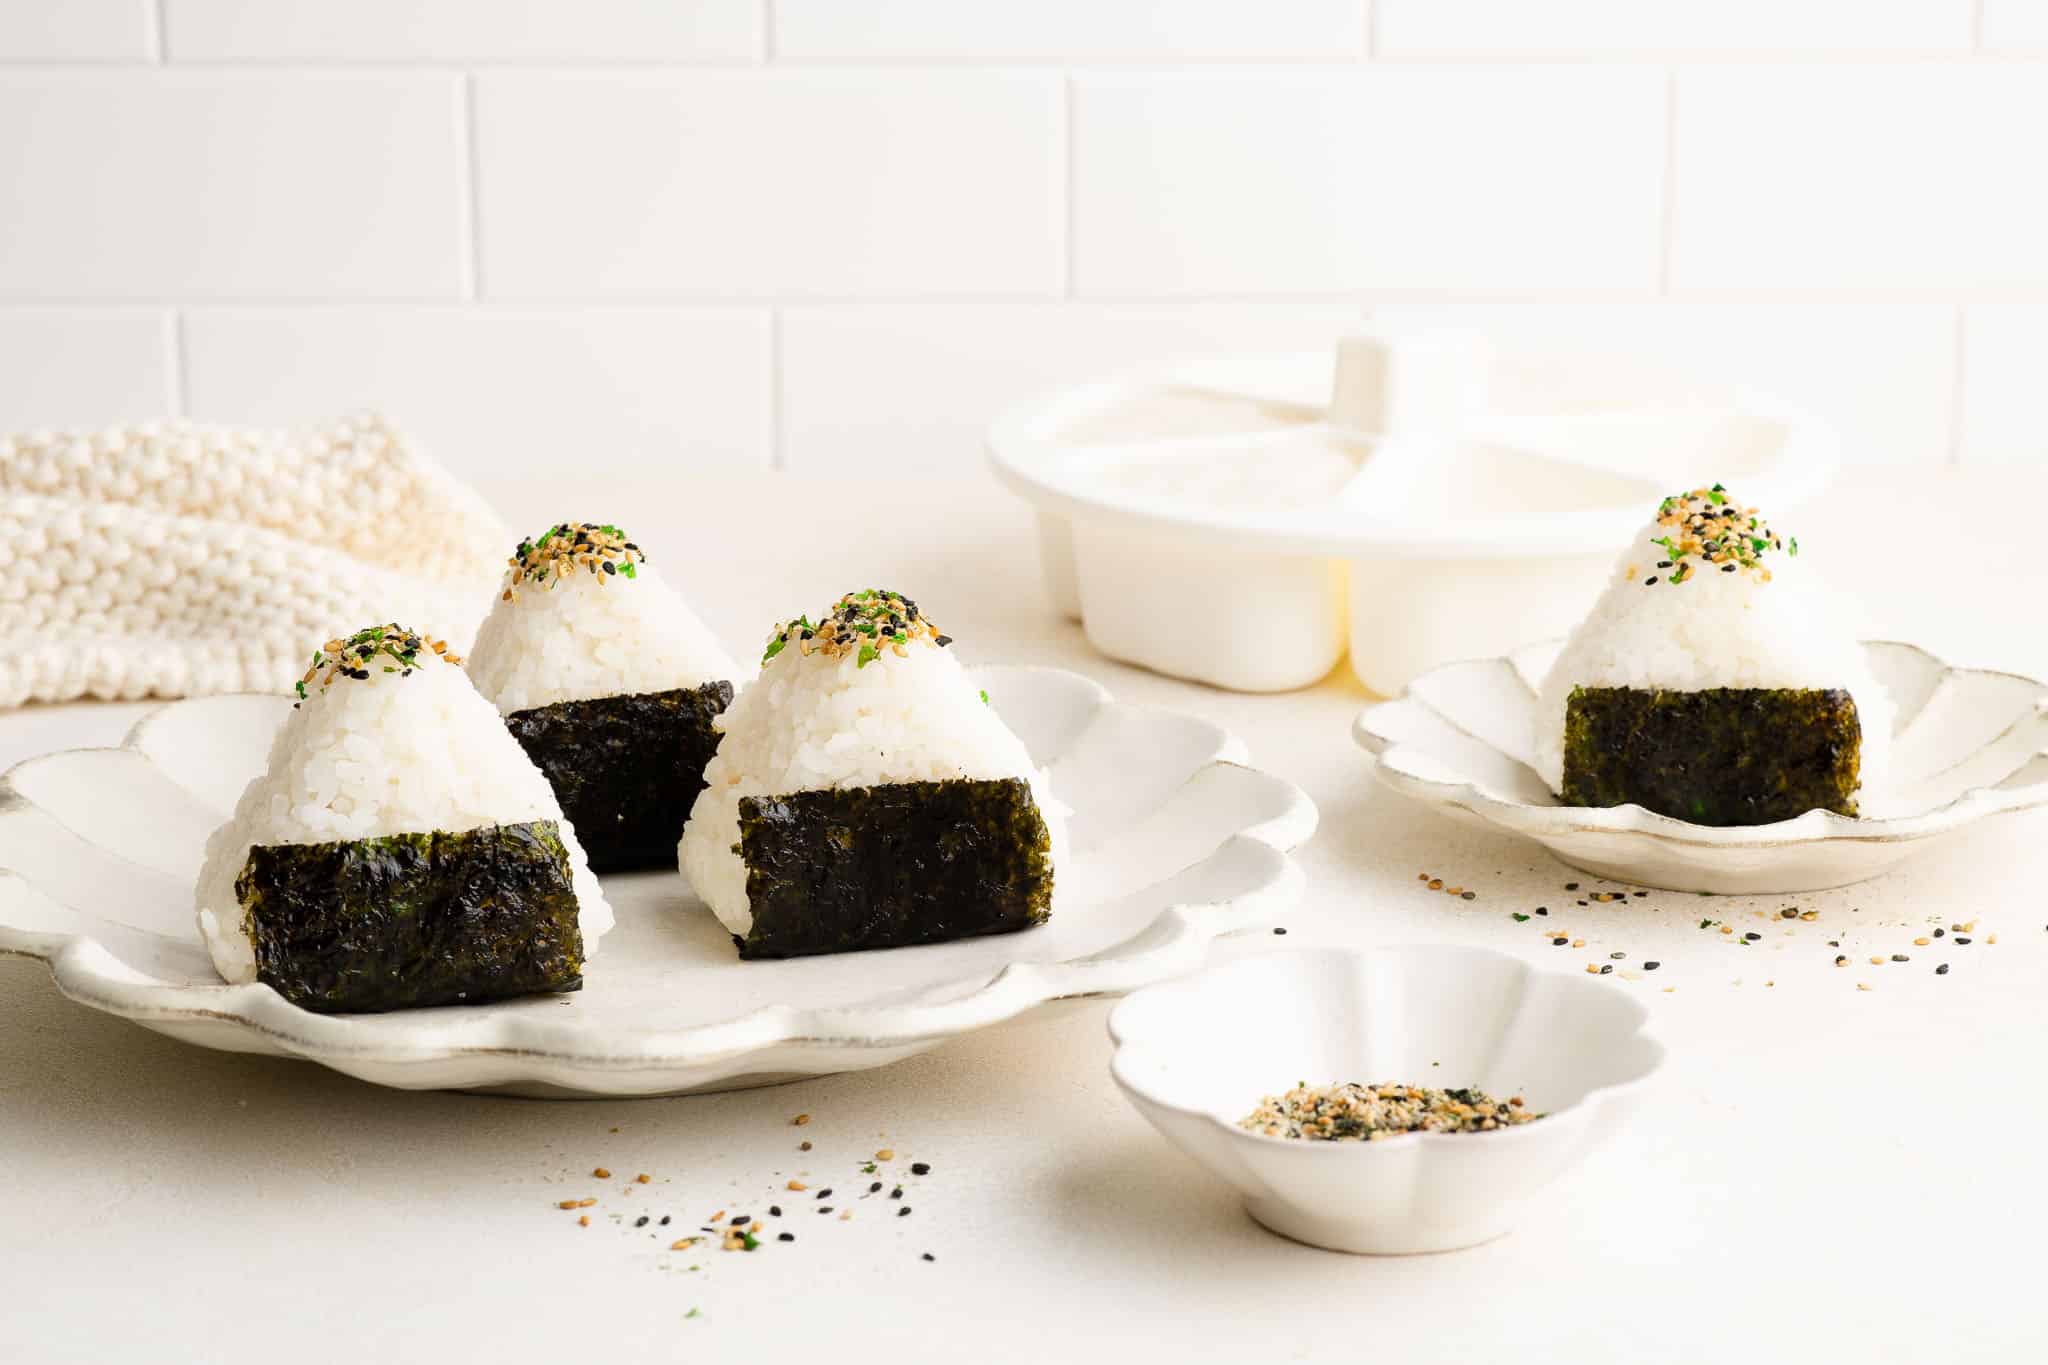
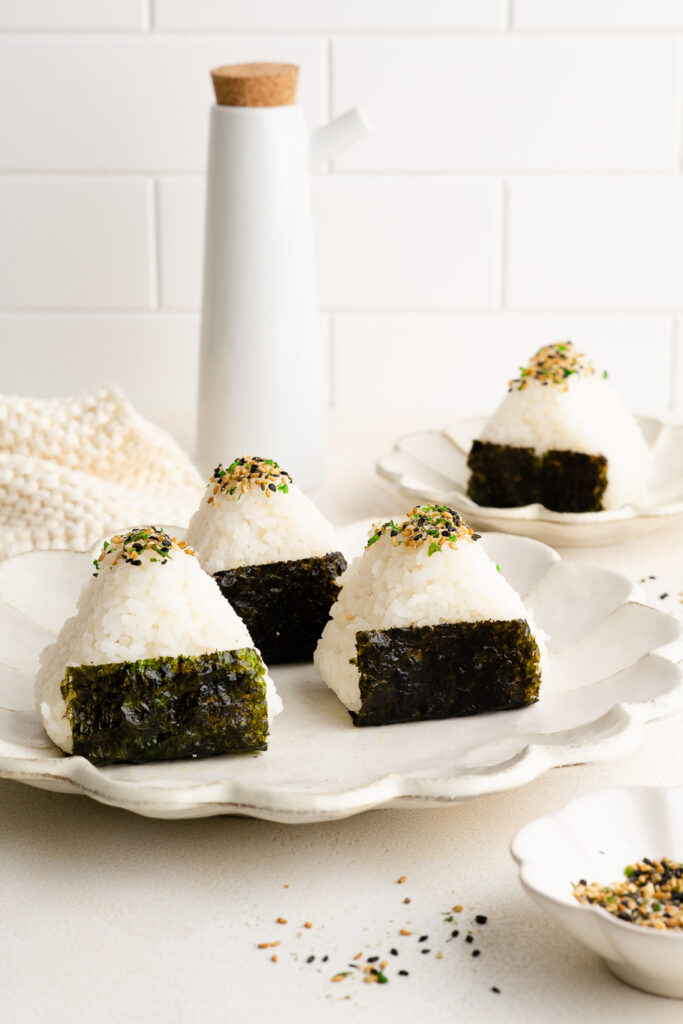
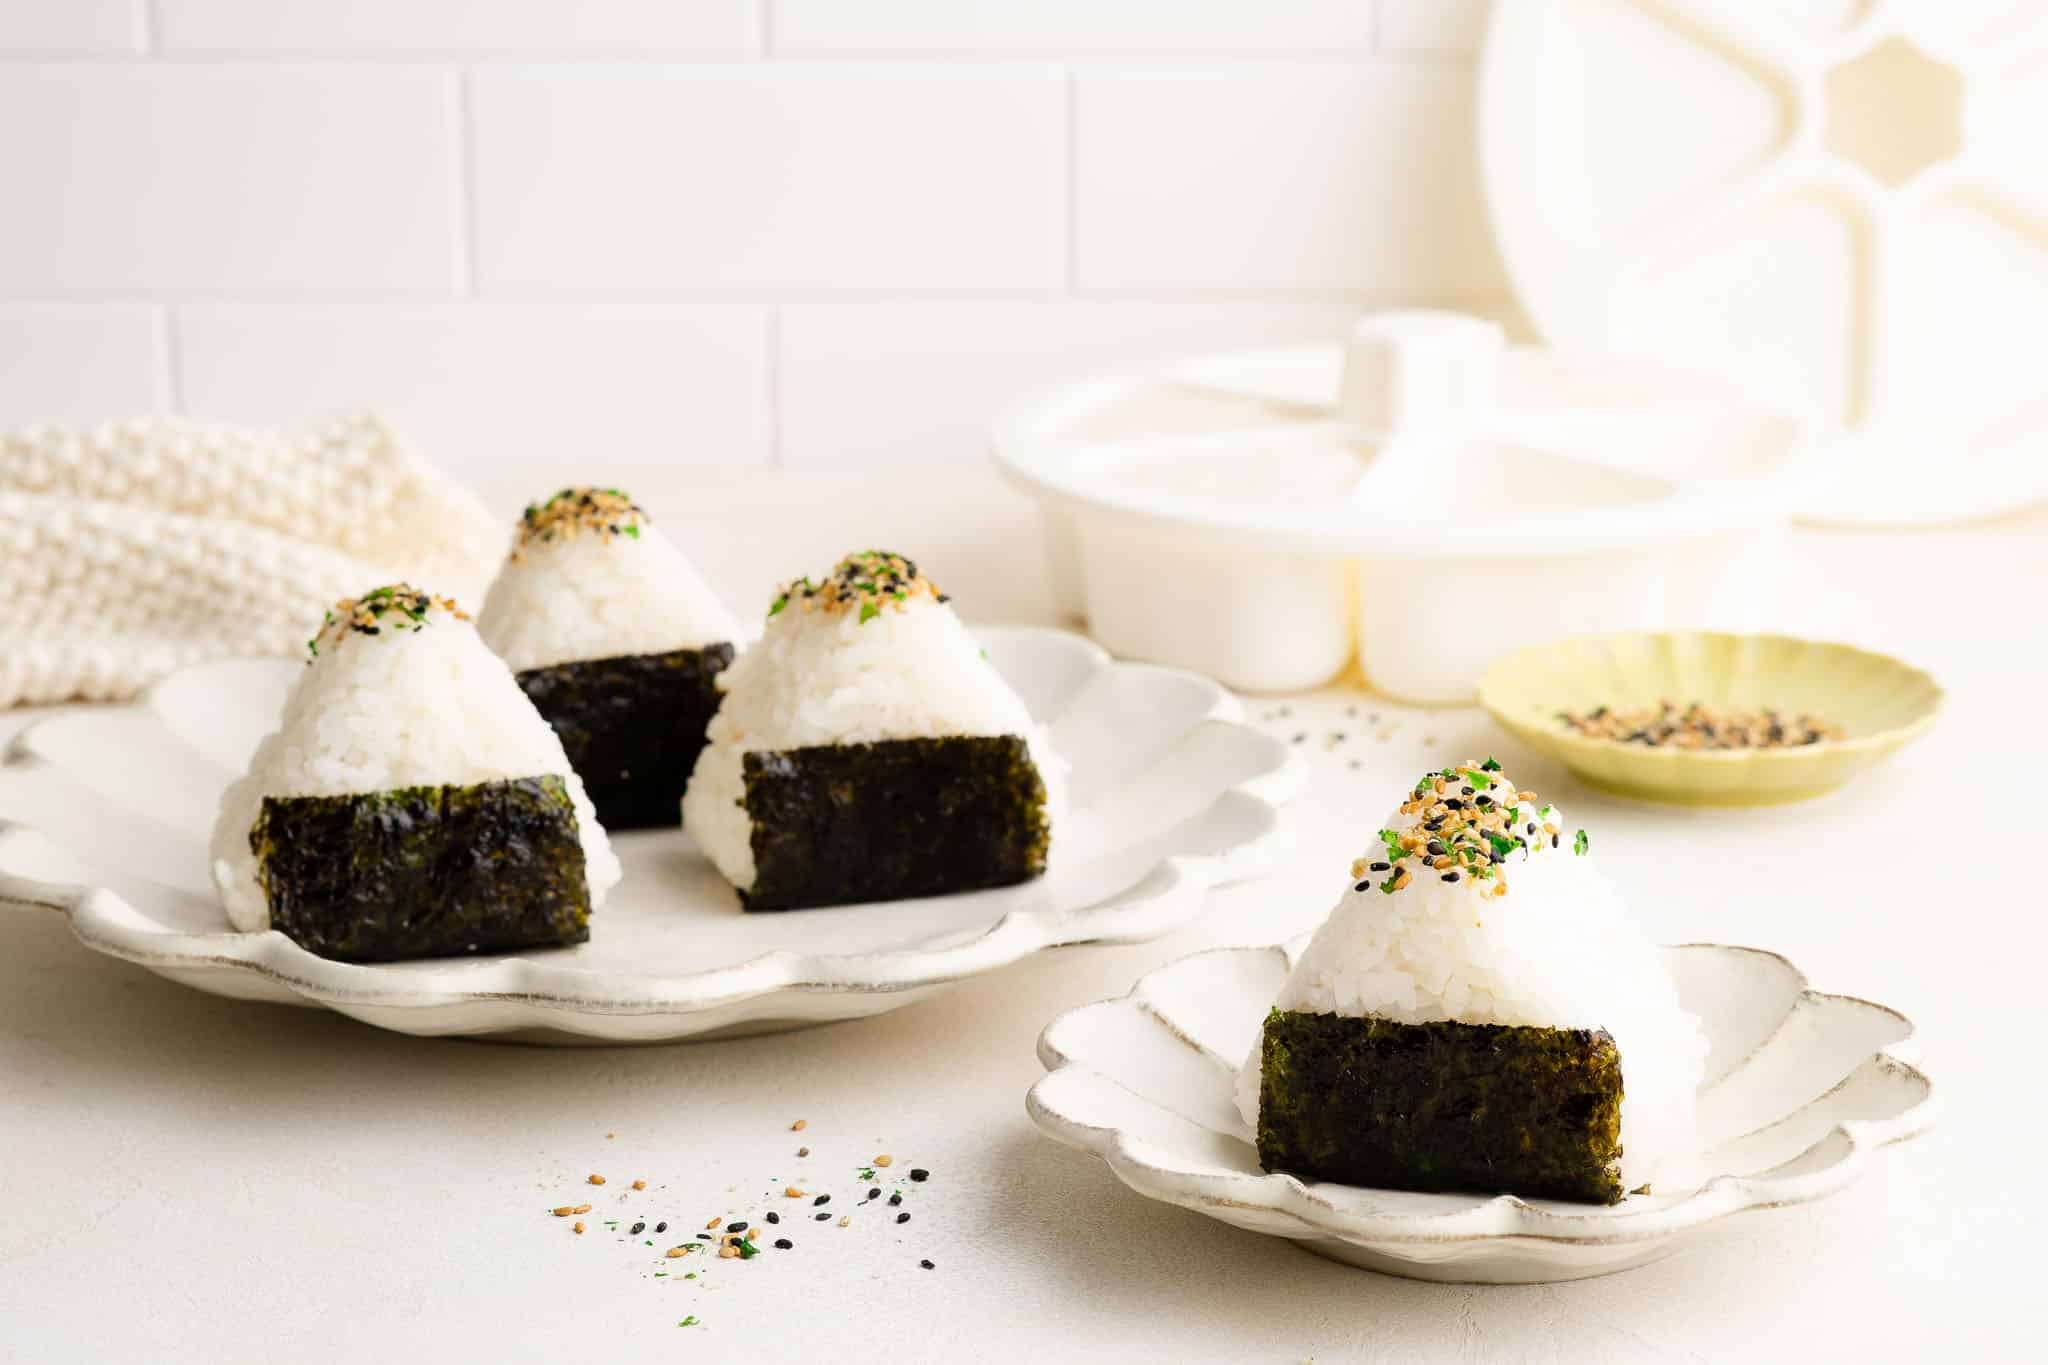
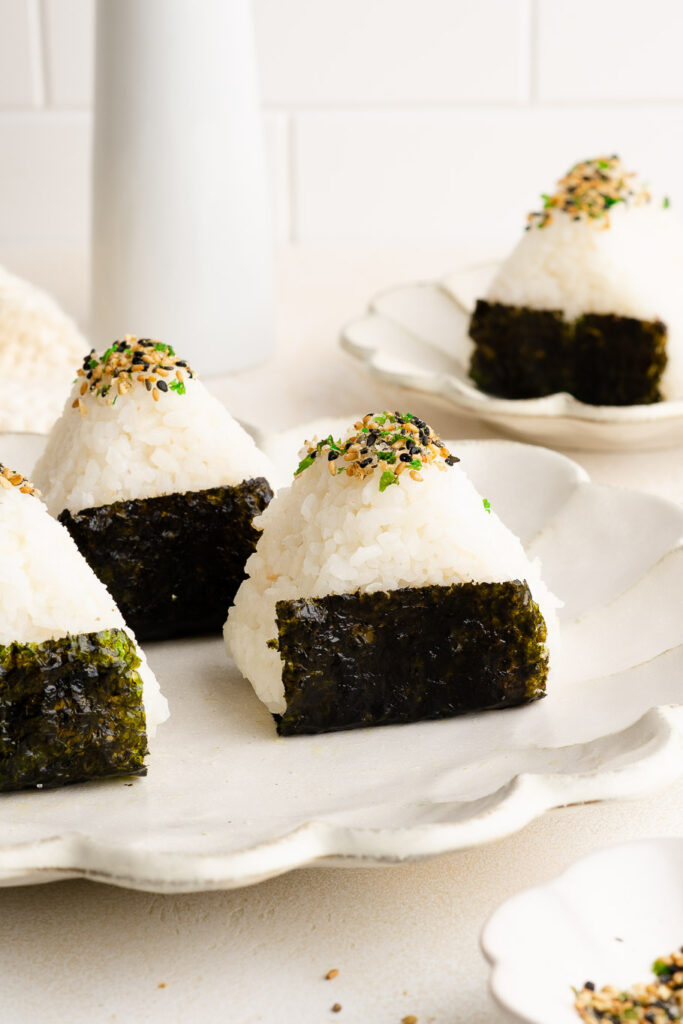
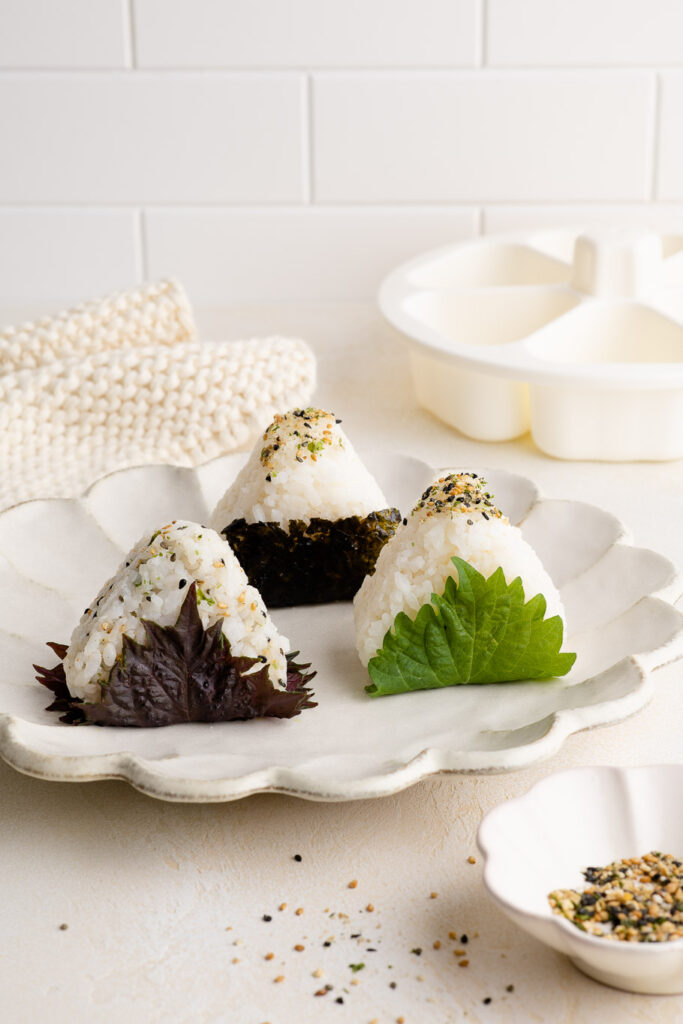
Wrap the bottom of the Onigiri with a small sheet of nori, and dip the top of the Onigiri in some furikake. If you really love furikake, you can also roll the sides in the furikake. How much or how little is up to you!
Tips for Making Onigiri
- Crispy nori. In my home, some of us like the nori to be crispy when served. So I often do not wrap the Onigiri with seaweed, but instead serve the nori sheets alongside for people to help themselves.
- Big or small nori. Sometimes, Onigiri is served with a small sheet of nori. At other times, I have eaten Onigiri which is almost completely covered in nori. I recommend the latter for large Onigiri as it helps to contain the rice and it makes for an easier eating experience.
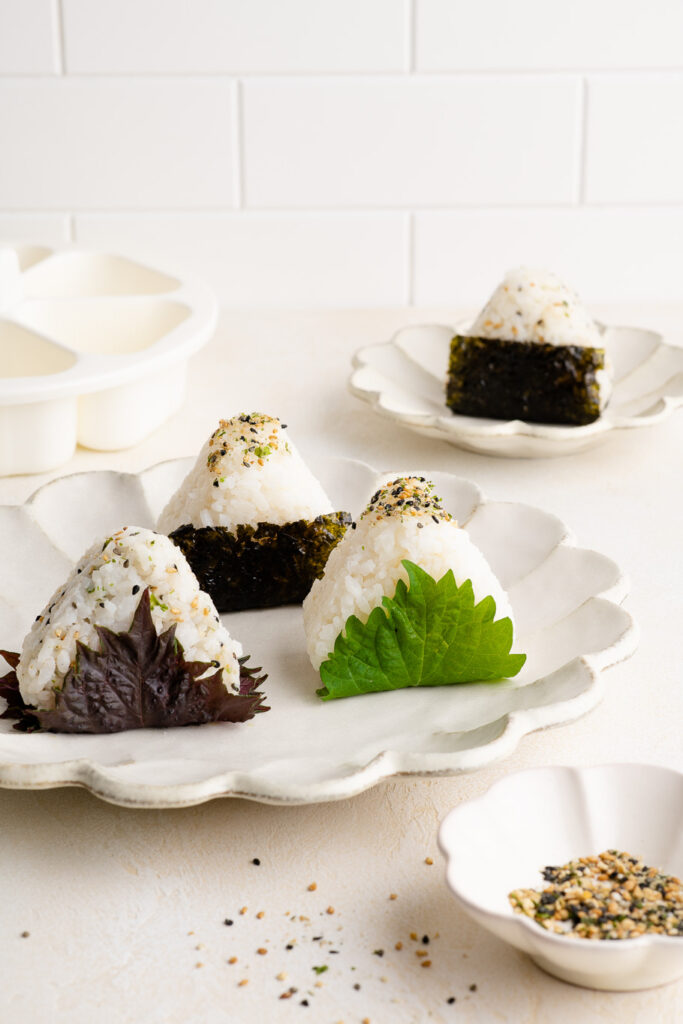
- Use herbs. An alternative to nori are shiso leaves or perilla leaves, which add a beautiful minty freshness. Look for green shiso leaves, but I also like the flavour of red shiso.
- Use leftovers. I tend to make Onigiri as a way of using up leftovers, such as leftover Teriyaki Salmon or Teriyaki Chicken. I’ve also used leftover roast chicken mixed with some mayonnaise, or maybe I have some ripe avocados that need to be used up.
- Make a variety of fillings. If you are making a large batch of Onigiri, I recommend making 2-3 different fillings to offer some variety at the table. Sometimes, just adding furikake to the rice for a few Onigiri is enough of a change.
Easy Onigiri
- Prep Time: 20 mins
- Cook Time: 40 mins
- Total Time: 1 hour
- Yield: Makes about 6 onigiri
- Category: Lunch
- Method: Stove Top
- Cuisine: Japanese
Tuna Onigiri are a tasty and nutritious snack made with sushi rice, filled with a delicious tuna mayo filling, and wrapped in crispy seaweed. Make these delightful rice balls at home for the perfect snack or light meal.
 Print
Print Pin Recipe
 Rate
RateIngredients
For the Sushi Rice
- 350 g (heaped 1 1/2 cup) sushi rice
- 500 ml (2 cups) cold water
For the Seasoning
- 2 1/2 tablespoons rice vinegar
- 1 1/2 teaspoon sugar
- 1/2 teaspoon fine salt
For the Filling
- canned tuna, drained
- 2–3 tablespoons Japanese Kewpie mayonnaise
- 1 tablespoon lemon juice, or to taste
- freshly ground white pepper, to taste
- handful chives, finely chopped
To Serve
- nori (seaweed) sheets OR nori seaweed snack
- furikake
- shiso or perilla leaves, optional
Instructions
To Make the Sushi Rice
- Measure the rice into a bowl.
- Transfer the rice into a fine sieve through which the rice grains cannot escape.
- Wash and rinse the rice under a cold tap until the water runs clear. Use your hands to gently move the rice around the sieve. At first, the water will appear milky and cloudy, but as the starch rinses away, the water will start to look clear.
- Shake the sieve to remove as much excess water as possible.
- Transfer the rinsed rice to a medium-sized saucepan with a tight-fitting lid. I like to use a cast-iron pot to cook my rice, but any stainless steel pan will work as well.
- Measure the water.
- Pour the water over the rice in the saucepan.
- Cover the saucepan with a lid.
- Place the saucepan on the stove.
- Cook the rice on low to medium heat for 30 minutes. The water should not come to a boil; it should just gently simmer so that the rice will cook slowly and gently. A glass lid will help you to see how the rice is cooking.
- After 30 minutes, turn off the stove and remove the saucepan from the heat source.
- Let the rice continue to steam for about 10 minutes, but you can skip this step if you are in a hurry.
- Fluff the rice before serving.
To Season the Sushi Rice
- Transfer the rice to a large sheet pan or similar.
- Using a rice paddle, spread out the rice in a thin layer so that it can cool down quickly.
- Sprinkle over the seasoning ingredients.
- Use the rice paddle to mix everything together by folding the rice over onto itself, and then spreading it out again.
- Leave the rice to cool until it is at room temperature before using in recipes for sushi, onigiri or similar.
To Make the Tuna Filling
- Drain the tuna.
- Place the tuna into a medium-sized mixing bowl.
- Flake the tuna with a fork.
- Add the remaining ingredients.
- Mix everything together until the ingredients are well combined.
- Taste for seasoning.
- I like to transfer the filling to a large piping bag, but you can skip this step.
To Assemble the Onigiri
- Use a small spoon or spatula to place some rice into the onigiri mould, about halfway up.
- Use the spoon to compact the rice together gently.
- Use a melon-baller or similar to make a small dent in the middle of the rice.
- Place about a teaspoon of the tuna filling into this dent.
- Cover the tuna filling with more rice, enough to fill the mould.
- Place the lid onto the onigiri mould and press gently to compact everything together.
- Gently remove the onigiri from the mould.
- Wrap the bottom of the onigiri with a piece of nori, cut as big or as small as you like. Alternatively, use a shiso leaf or perilla leaf in place of the nori.
- Sprinkle the top of the onigiri with some furikake.
- Serve the onigiri immediately.
- Onigiri is best made just before serving, but it can keep for a few hours in the fridge. If you are not serving the onigiri right away, wrap them individually in plastic wrap to prevent the rice from drying out.
Kitchen Notes
 WHAT TEMPERATURE TO COOK RICE
Each stove is different, so you will have to experiment with your stove a bit. But generally speaking, you want a low to medium heat so that the water comes to a gentle simmer. The rice will cook slowly and gently. For my Bora induction stove, I use setting 5 out of 9.
 RATIO OF RICE TO WATER
For sushi rice, you generally need a ratio of 1:1.25 of rice to water. My recipe uses a ratio of approximately 1:1.4. I think the ratio can vary slightly according to personal preference, as well as the rice you are using. Sometimes when I change brands of rice, I find that my usual recipe yields cooked rice which is too moist or too dry. I recommend experimenting by increasing or decreasing the amount of water by 1 tablespoon at a time.
 MAKE IT SPICY
Add some sriracha to the tuna filling for a spicy kick.
 CONVERSIONS
To convert from cups to grams, and vice-versa, please see this handy Conversion Chart for Basic Ingredients.
 OVEN & STOVE TEMPERATURES
All recipes on this website have been tested on an induction stove and/or with a conventional oven (i.e. an oven without fan). All recipes on this website use temperatures for a conventional oven, unless otherwise mentioned. Convection ovens (i.e. fan-forced ovens) are typically 20°C/70°F hotter than conventional ovens, but please check your manufacturer’s handbook.