

Labelling optical discs in an attractive and durable way has always been a bit of a challenge. While retail top discs with branding are often relatively ordinary and unattractive, deserving just “Sharpie” treatment, people often aspire for more aesthetically pleasing means of labelling their discs. This included the use of self-adhesive full-face labels, such as the Fellowes Neato 2000 Kit and variants, black-and-white thermal transfer prints and later, full-face printable discs with a CD-capable inkjet printer.
But there was another set of technologies that looked to use the optical disc burner’s own laser as a means to label a disc and that started earlier than you might think.
Yamaha DiscT@2
Yamaha was first to market in 2002 with the Yamaha CRW-F1, a 44x/24x/44x CD-RW drive with special features such as Audio Master mode, SafeBurn, Ultra-Speed CD-RW support with Mt. Rainier. It was to be known as their “ultimate CD-recorder,” competing with the likes of the legendary Plextor drives of the time. It was generally praised for its speed, but ultimately, did not achieve widespread success leading to Yamaha exiting the optical drive market altogether.
The feature most interesting to me is named DiscT@2 (disc tattoo) which burns an image into the unused data portion of the disc in 128-shades of monochrome. This required more precise tracking, rotation, laser intensity and positioning control, as the pit lengths were non-standard. It was an interesting and unique novelty when it was first introduced, but ultimately, criticised for not being useful as it required empty room on the disc to produce the image, could be especially difficult to read in the case of pthalocyanine dyes and resided on the data side of the disc which is usually not what users would be looking at.
Despite this, it was something that I remember vividly seeing in the press-releases in PC Magazine. Demonstrated on the Mitsubishi Chemical Corporation/Verbatim 16x AZO Dye discs, the contrast appeared quite eye-catching. I really wanted to buy one, but didn’t have the means at the time (just as I had also wanted a Plextor, but didn’t buy one either). The idea has always been fascinating to me.
Fujifilm Labelflash (DiscT@2’s Comeback)
It seems that Yamaha had already exited the optical drive business, but the DiscT@2 idea would not yet die off. Instead, it was being refined for a “relaunch” with DVD-based technology instead in 2005. This resulted in a second wave of drives supporting DiscT@2, but only for DVD media, including a range of Pioneer and NEC models (as both use the same sort of chipset).
This time, instead of only labelling the bottom of a disc, Fujifilm developed a new vivid-blue dye for the top of a disc as well, allowing the top of the disc to be burned to a monochromatic blue/silver image. As the dye is sandwiched inside, the print is protected in a way similar to LightScribe for DVD for protection, although it offers a higher contrast. This system was called LabelFlash, with a claimed 300-1800dpi resolution and 256-tone greyscale. There had been plans for colour as well, but support was discontinued in 2017 and media production ended on 22nd December 2016.
Labelflash media is relatively rare to encounter and can be rather expensive to purchase, especially compared to LightScribe which was the more common standard, which too, has since become rare and somewhat abandoned. It seems the means by which tracking is achieved on LightScribe relies on a clock-pattern etched into the centre area of the disc, while Labelflash uses some sort of pre-groove which makes the top surface similar to a recordable DVD but with different dye.
While it was recognised as an interesting curiosity, it too did not find commercial success, in part due to the faster and more visually effective solution of using printable-top media with a compatible colour inkjet printer, or by using full-face self-adhesive labels. Laser labelling of discs became a rarity.
Obtaining a Labelflash Drive
I never actually set out to purchase a Labelflash drive. In fact, Labelflash was so poorly advertised that I haven’t actually ever seen a drive with it advertised unlike LightScribe. Instead, I managed to convert one of my existing drives to being Labelflash capable.
The drive in question is a Pioneer DVR-111DBK which I purchased a long time as an OEM drive from a local computer store. After owning it for a while (it’s a superb burner), I decided to use TDB’s firmware to crossflash it into a DVR-111L and then upgrade it to the latest 8.29 firmware. Unlike LightScribe, this operation is usually all it takes to enable Labelflash as no additional hardware is necessary (i.e. there is no special optical reader hardware for a dedicated clocking track like LightScribe).
As the drive is an IDE drive, I had cannibalised an old external LG GSA-5160D DVD Burner’s enclosure and swapped in the DVR-111DBK (now L) to turn the drive into a USB 2.0/IEEE 1394 drive. That was an easy fit and I didn’t feel bad about it since the GSA-5160D had a laser failure and was a poor burner anyway (the discs it produced had relatively high PO/PI readings).

I’m glad to report that after all these years, this combination is still going strong. The light on the front is solid when it’s burning a label.
Making a Label
A label can be made with the official LabelFlash software which was freely available, but I have never used it. Instead, I used the “tried and true” Ahead Nero Burning ROM software instead. It is claimed that Version 7.0.2.8 supported Labelflash, however, support actually began before this.
With the launch of the NEC ND-4551, there was a specialised version of Nero 6.6.1.3 that supported Labelflash, enabled with a specific serial key. This support has been maintained with updated versions versions of Nero 6. As Nero became more bloated with successive versions, I kept with the final version of Nero 6 which I had archived, which was 6.6.1.4. This was run inside a Windows 2000 Professional VM as the software is known to have incompatibilities with Windows 7 and newer.

If the correct serial key is entered, the golden disc icon with a red laser beam forming the shape of the V in the rightmost of the toolbar should be visible. If the icon is not visible and a Labelflash capable drive is installed, your serial number does not enable this feature. It took a bit of digging through my discs to find the right code to unlock the feature.

Clicking on this button displays the main window where the label can be designed. Features are provided to insert text, shapes and images. The right-hand panel allows for configuration of the printing area, which is automatically selected to avoid damaging any data already recorded. Printing quality can be configured and a preview can be run. Label templates can also be selected. The currently inserted disc type is shown along with the estimated label burn time. The rotation speed, at least for my drive, is fixed at 2250rpm.
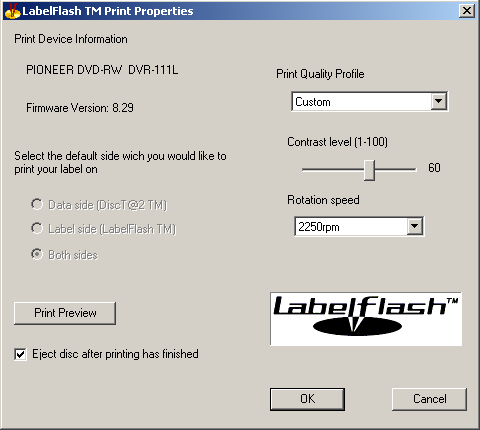
Pre-set print quality profiles can be selected, or a custom contrast level of 1-100 can be set. Rotation speed is fixed for this drive.


Depending on the detected media, the logo changes between DiscT@2 and Labelflash. The second instance decided the image was being burnt to the top side due to a bit of a firmware quirk when swapping discs – unfortunately, I don’t have any Labelflash media myself.

The preview shows a monochrome image preview of the printed disc. Printing images is quite fiddly, as there are not many images where you can take a large chunk out of the centre and still be appealing to the eye.

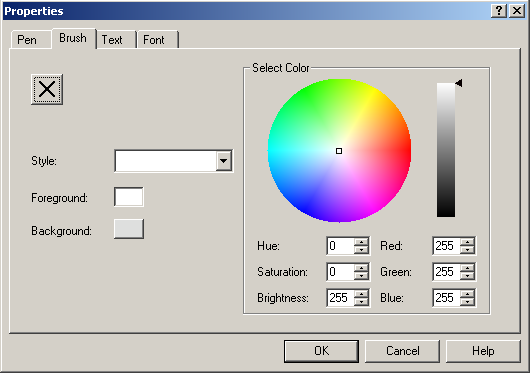

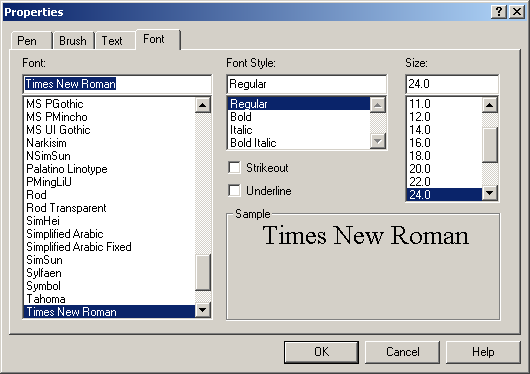
The software is quite fully featured, with the ability to import images from file or scanners. Text can have its colour set (despite the print being monochrome) and text can be bent and rotated. Font type, style and sizes can be configured.

If you try to burn a label to an empty disc, you will be warned not to write data to the disc afterwards. This is because the disc dye surface has been “damaged” by the laser, but the regular structures on the disc are not written, thus the disc will still appear blank to all DVD burners. It is possible to attempt to write data to the disc, but the resulting burn will often be unreadable if your image consists of more than a few “hairlines”.
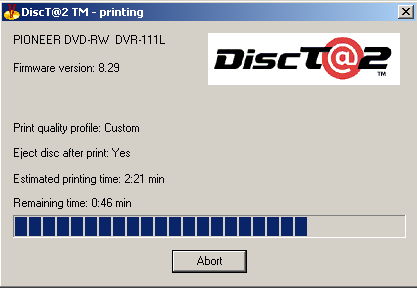

The printing process begins once the dialog is accepted. In the case of a disc that has been already written, the dialogue is not shown. Printing time depends on selected contrast – a full surface at a 100 contrast setting takes a rather long 78-minutes or so to write.

At the end, you are greeted with the completion dialogue if all went well and if eject is ticked, the disc would be sitting on the ejected tray. If a failure occurs, then a failure message is shown.

During initial testing, the drive dropped off the USB bus during a burn causing a fail. This was traced down to a bad USB cable. Unfortunately, burning the same label to the disc again is not advisable as DiscT@2 does not enforce the rotational alignment, resulting in a random rotation between the burns.
The Look of a T@2
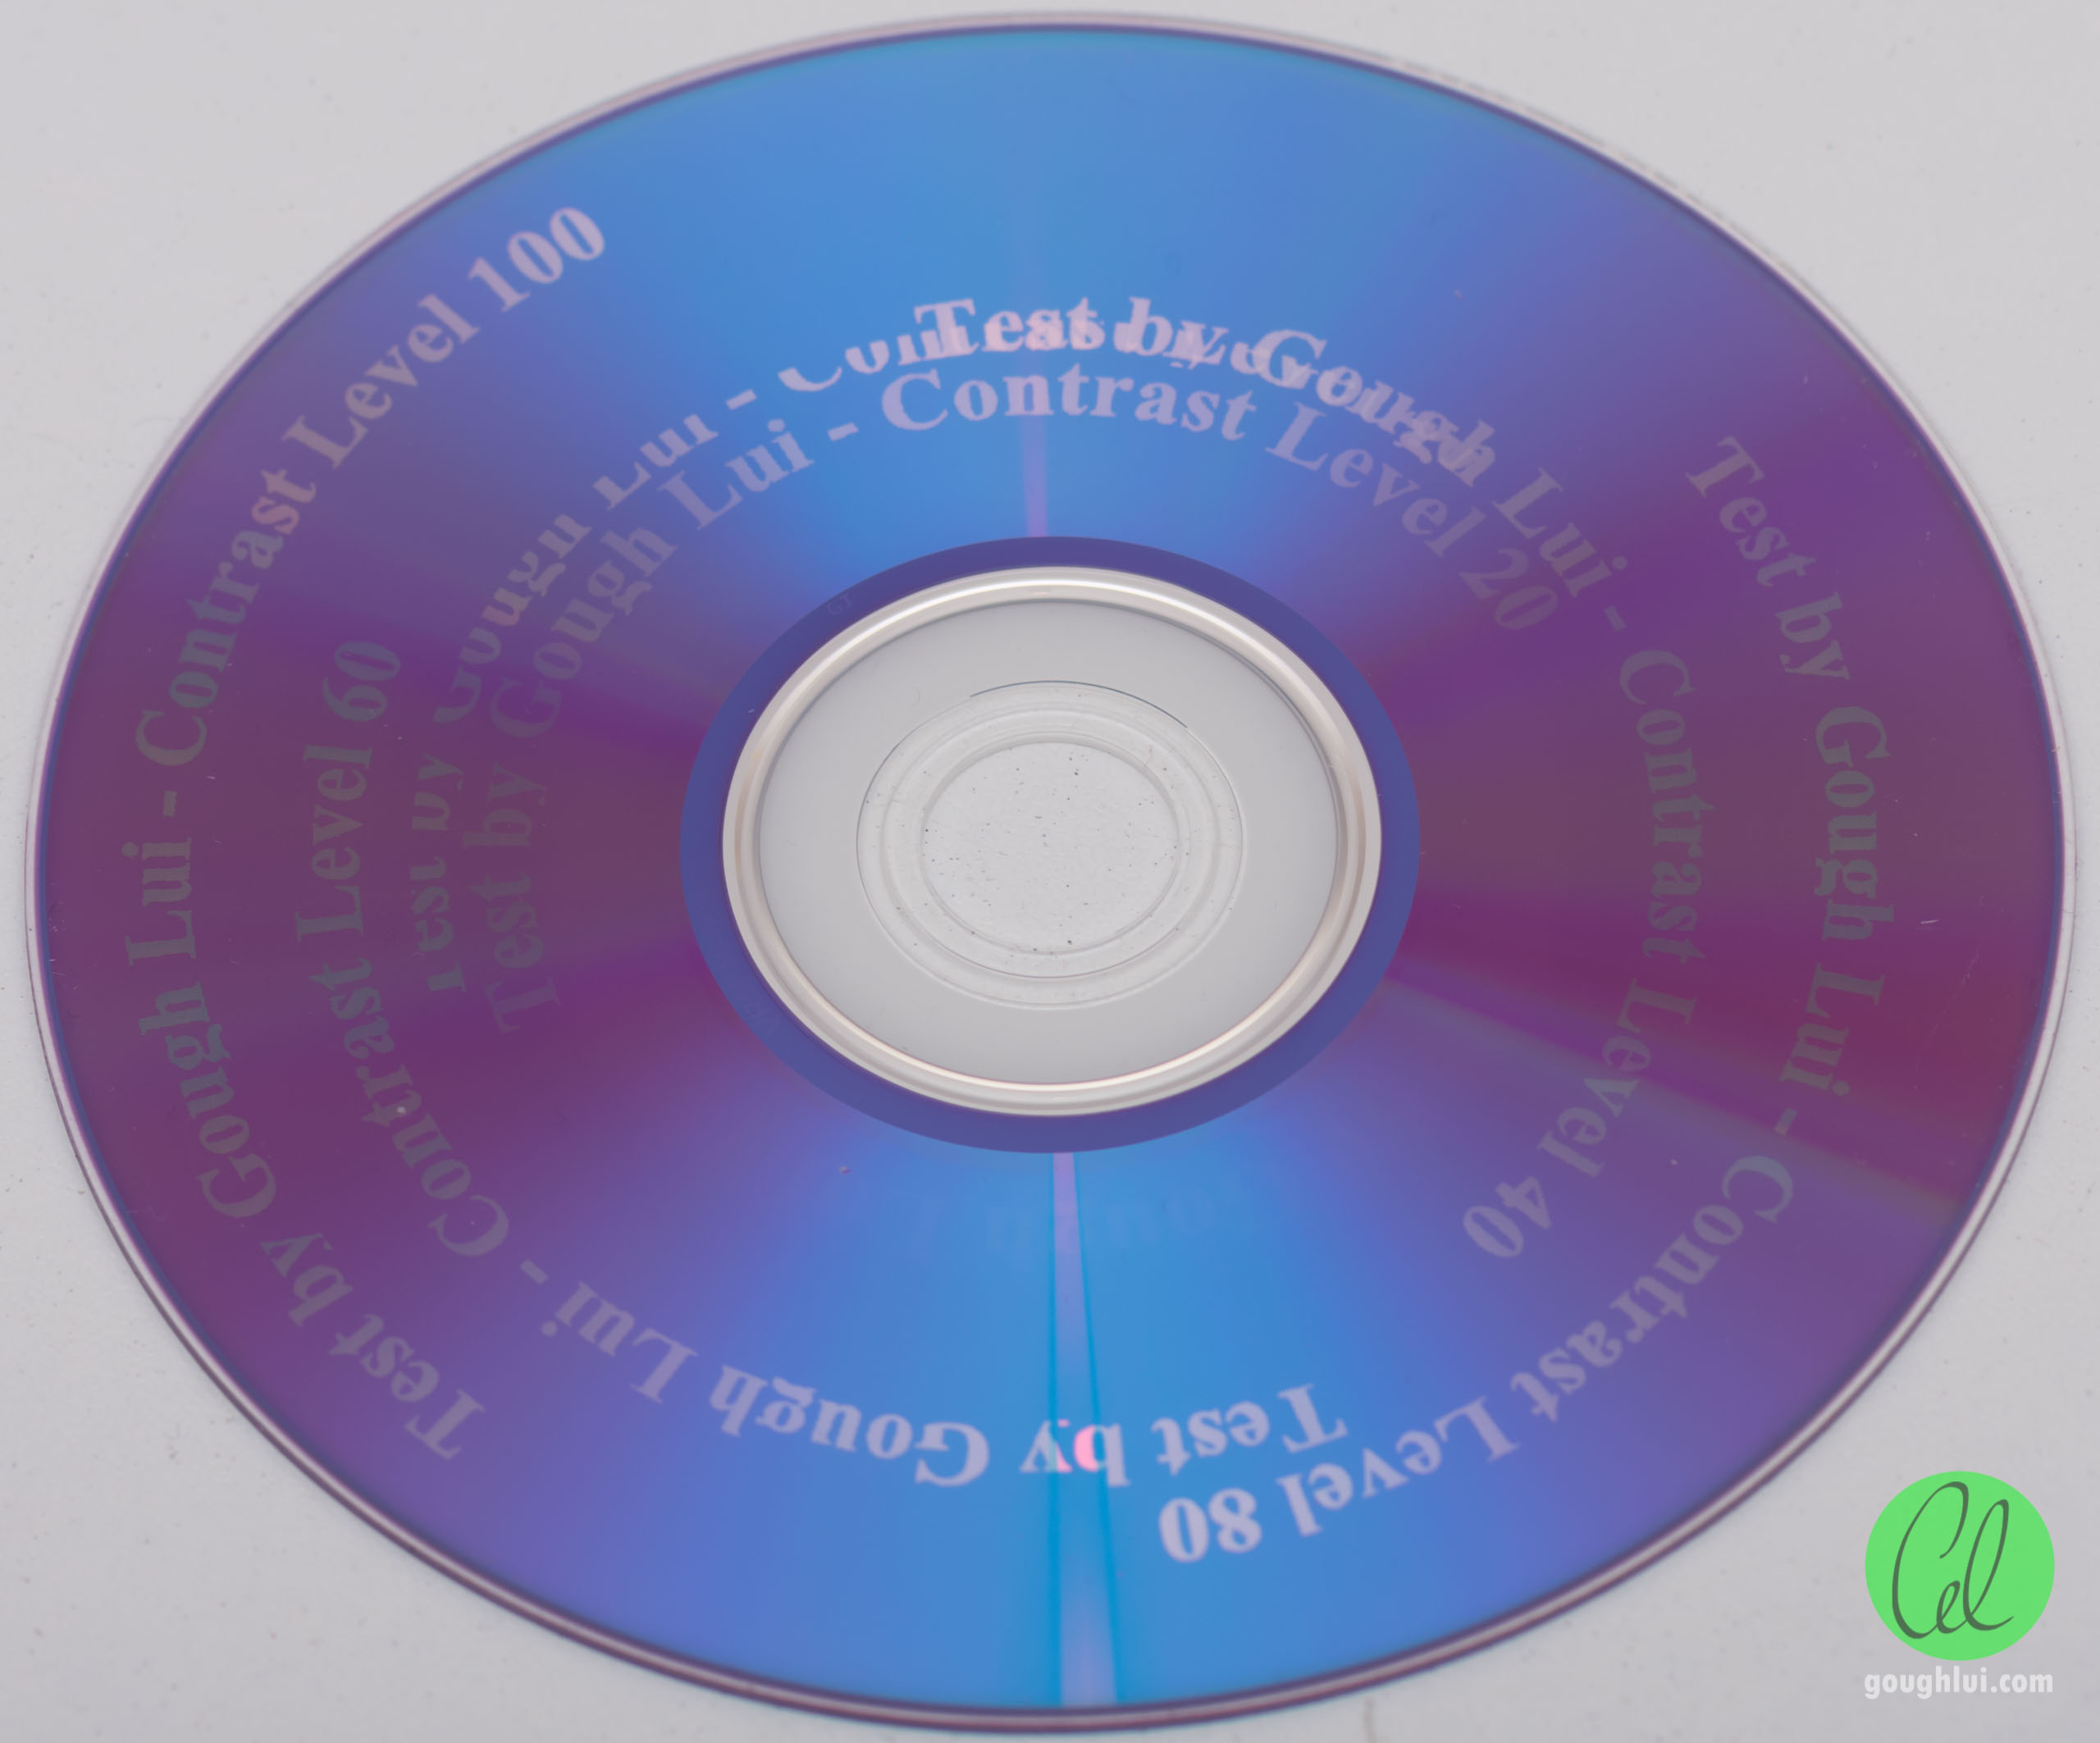
The first test was one of contrast levels. Burning a band of width 5mm, I had text with various contrast levels including 1, 20, 40, 60, 80 and 100. Unfortunately, during the burn of the 40-level band, the USB connection dropped. I thus retried the burn and the lack of rotational alignment is seen.


Contrast levels of about 40 and above look quite good, however, the absolute amount of contrast really depends on the angle at which the light hits the surface of the media. The top two images are contrast level 100, with light from the side on the left, and straight-on from the right. The next row has contrast level 40 on the left with the light just right, and contrast level 1 with the light just right. The contrast level 1 burn can be seen to be rougher, seemingly consisting of less “fill”.

With lighting from the side, the level 1 contrast burn is almost invisible – the e is just barely visible as a ghost towards the middle bottom. Thus burning with at least a contrast level of 20 is recommended. Contrast level 100 just takes a very long time, but the benefit is not that clear above say burning with 60. I still chose to burn at 100 for most of my test images as I had time to wait.

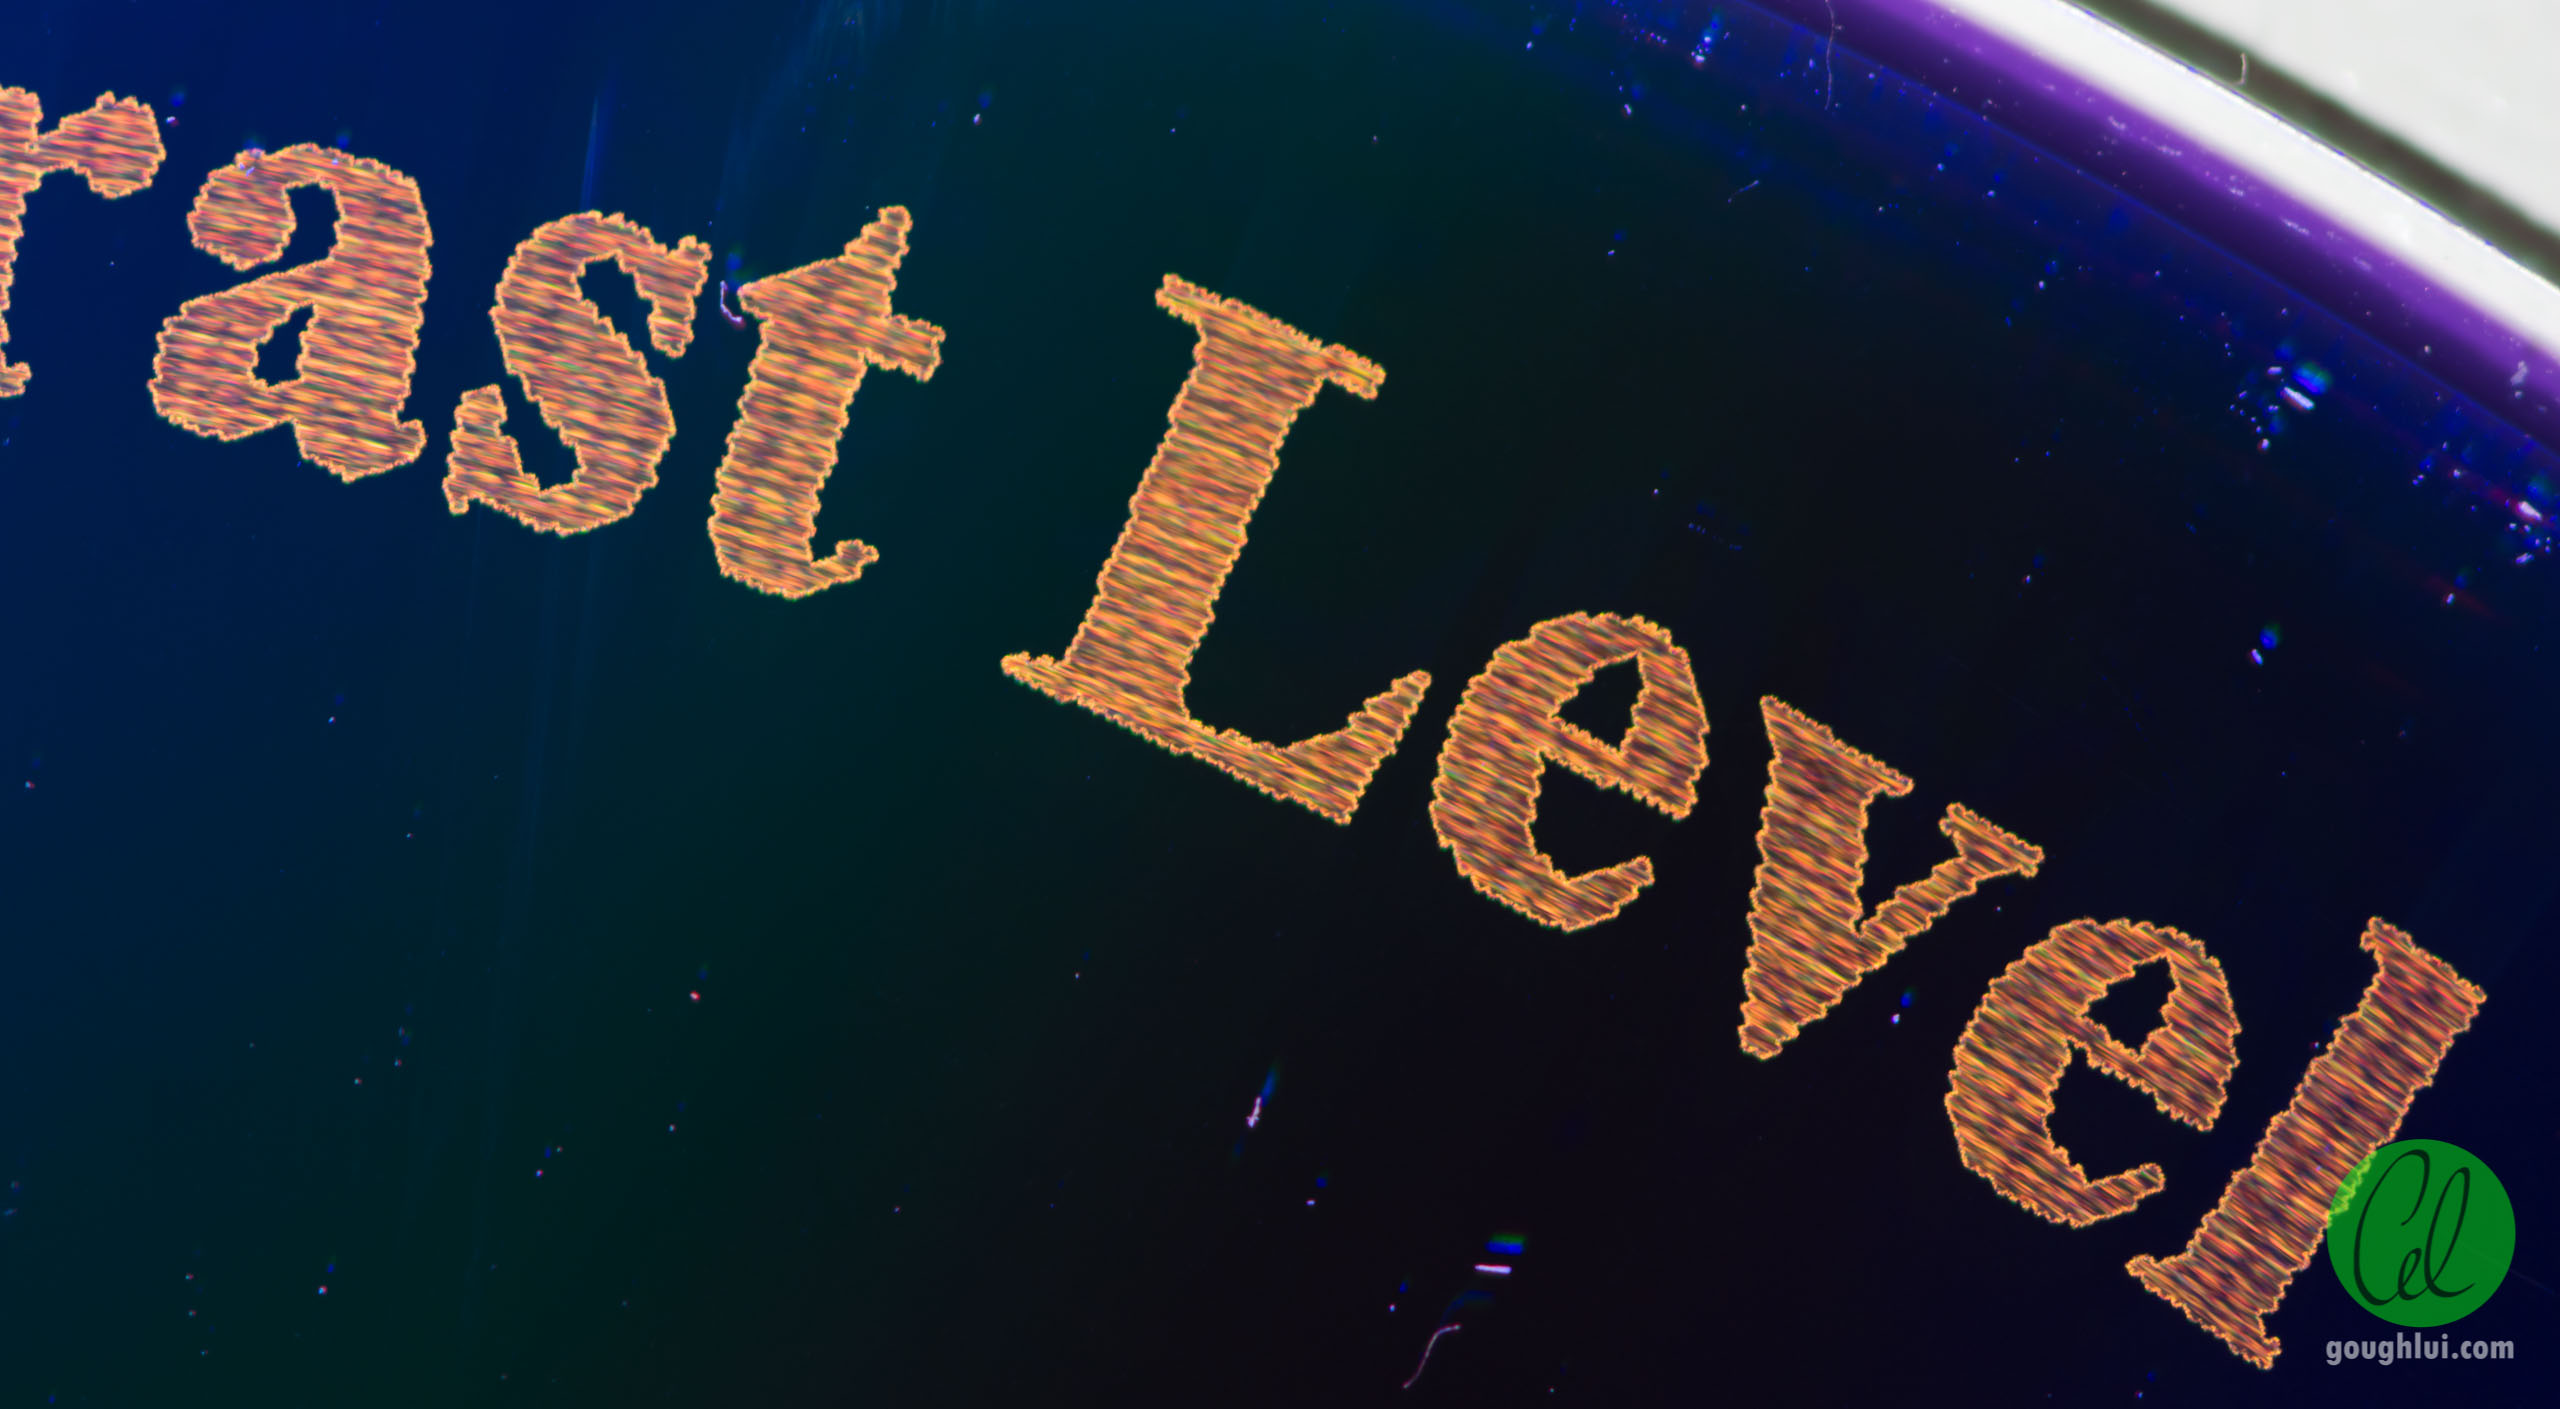
Despite the claims of high resolution, the resulting text does have “jagged” edges, the cause of which is not entirely clear. Perhaps it’s due to rotational speed control jitter and limited resolution of data from the app to the burner itself. It is not as “razor sharp” as I would have expected.

A full image from my Korea holiday was burned to a Ritek F1 disc, which I believe uses the Fujifilm Oxonol dye. The image has relatively low contrast, but this changes depending on the angle you view the disc. The greyscale is “inverted” – the white text comes up dark on the disc, which is why sometimes it works better to invert the image before burning.

Radial ring patterns can be seen around the disc, so perhaps laser power control from track to track is not perfect. But there is a good amount of detail in the resulting image. With the iridescence caused by the spacing of the tracks on the disc, this results in a rather cool colour tint.
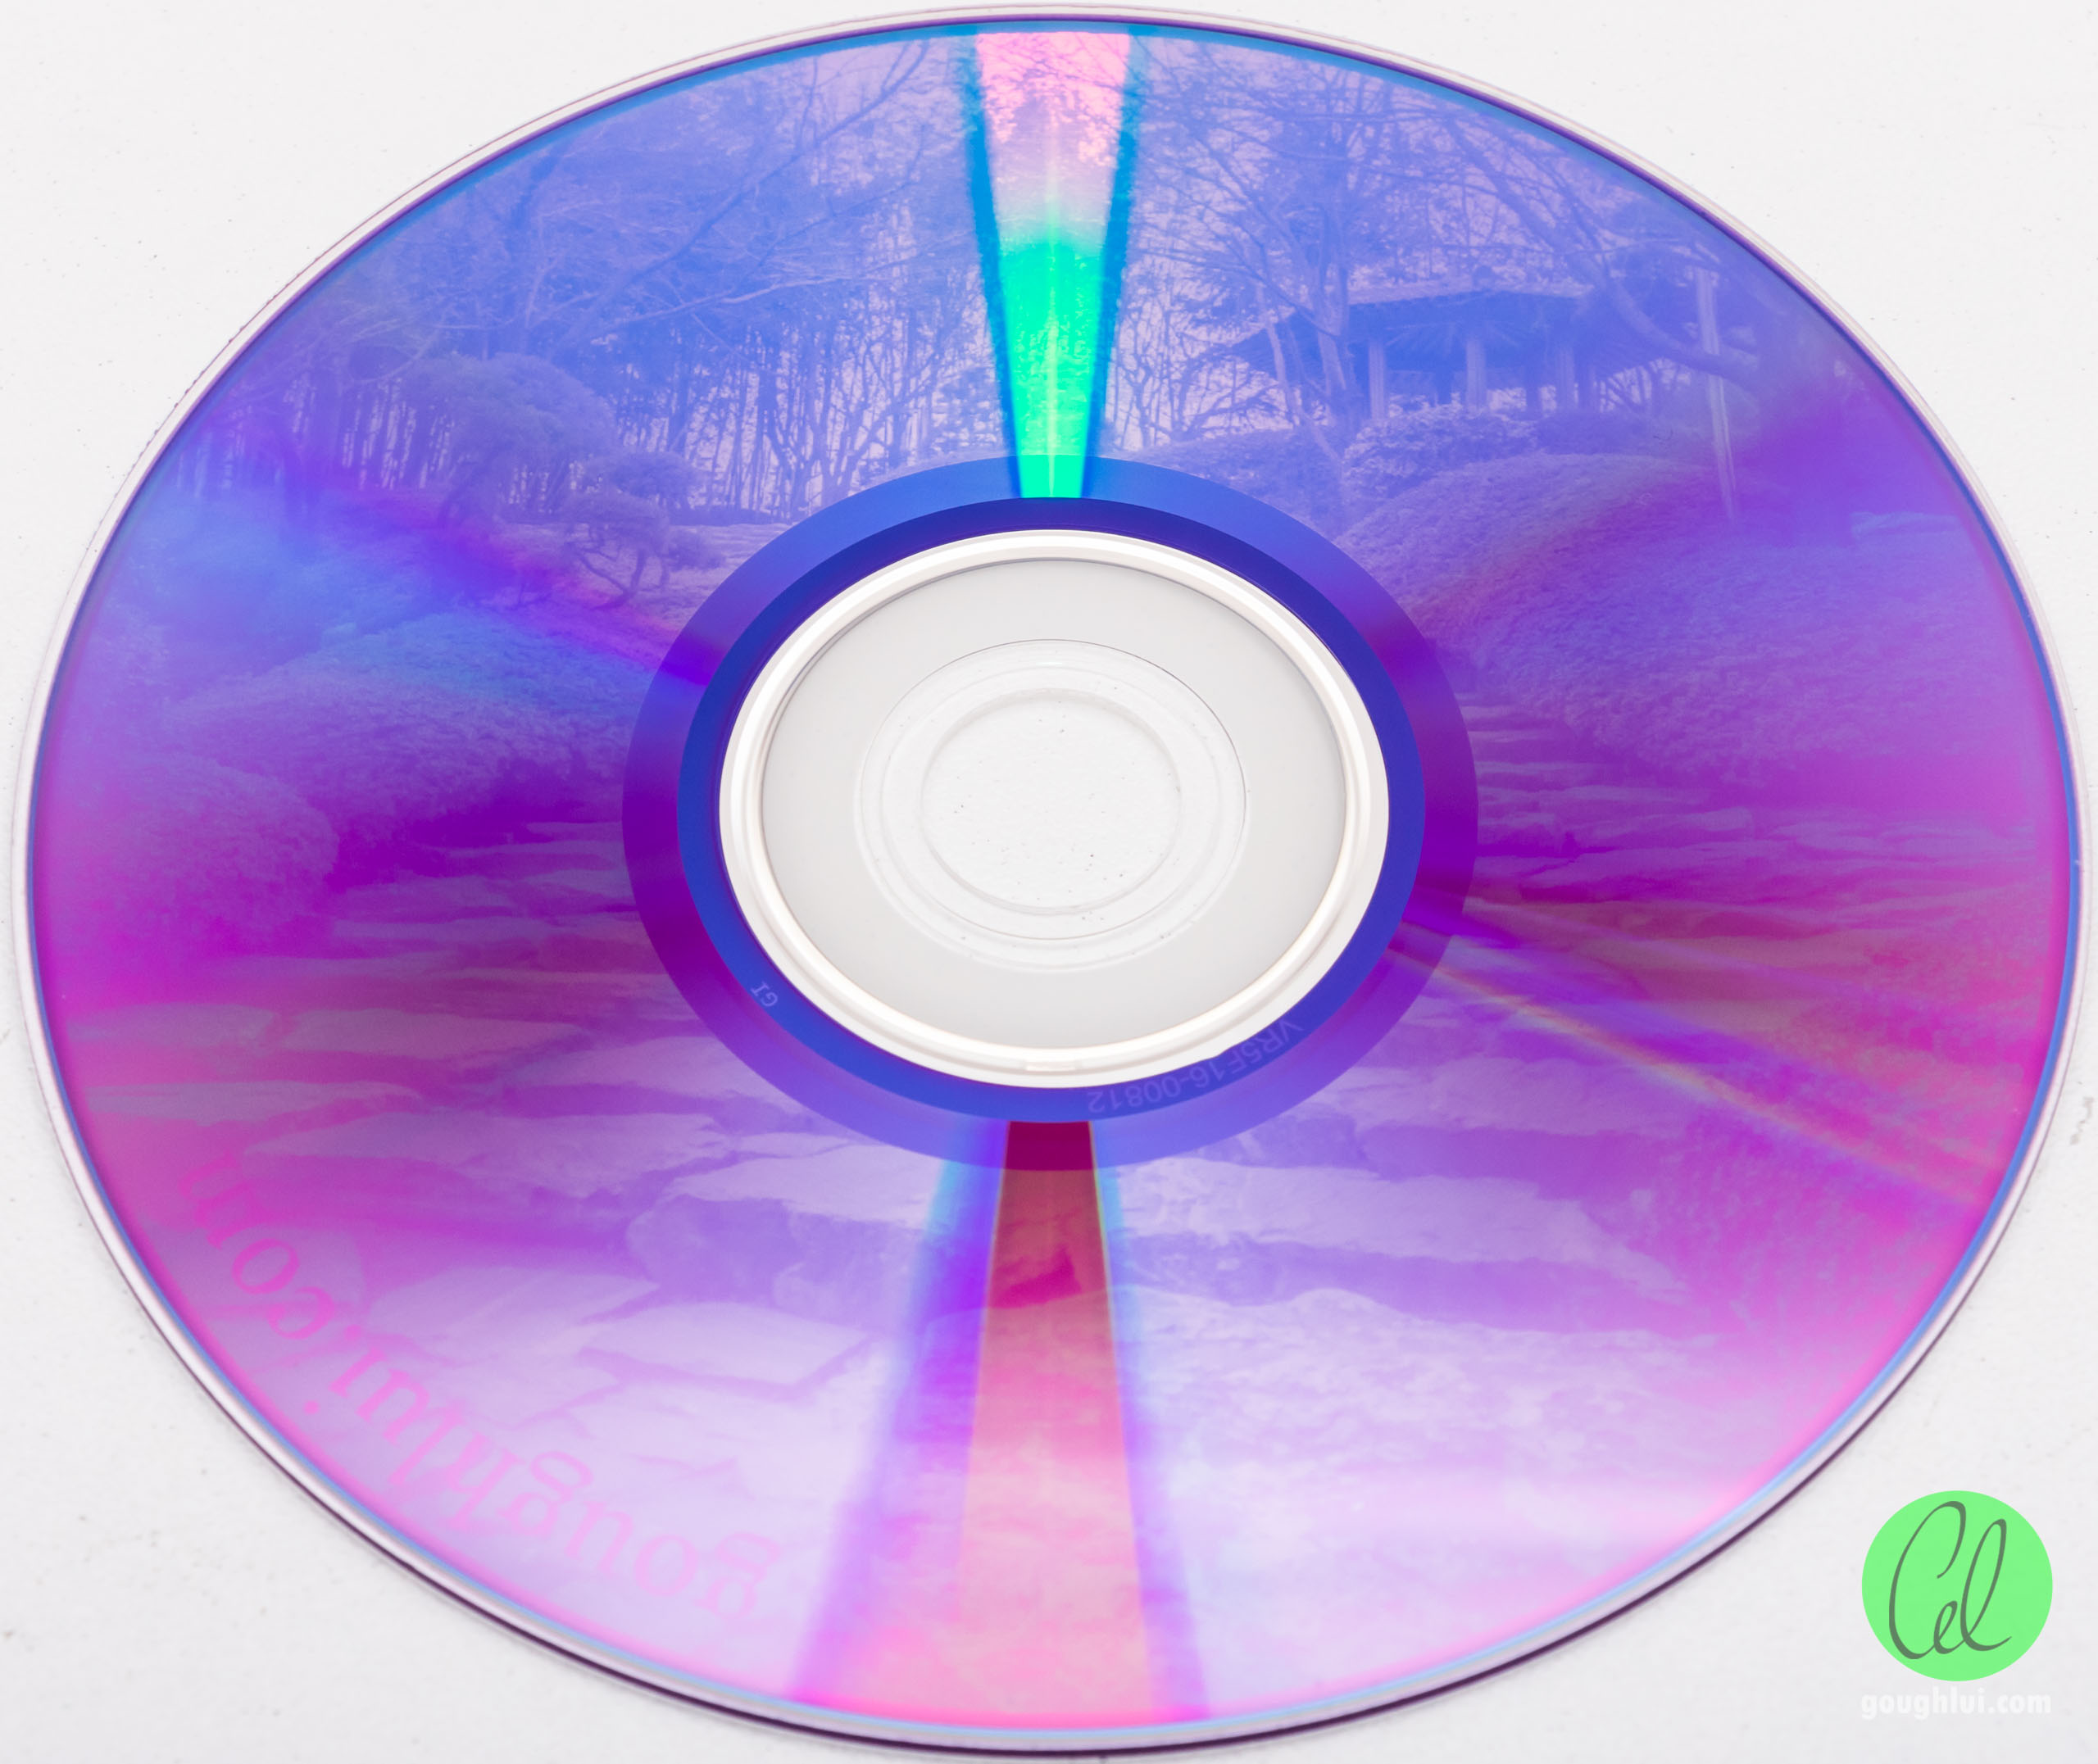
Same type of disc, different image, also from my Korea trip. The result has a similar but slightly better contrast.

The detail is actually quite good if you look closely.
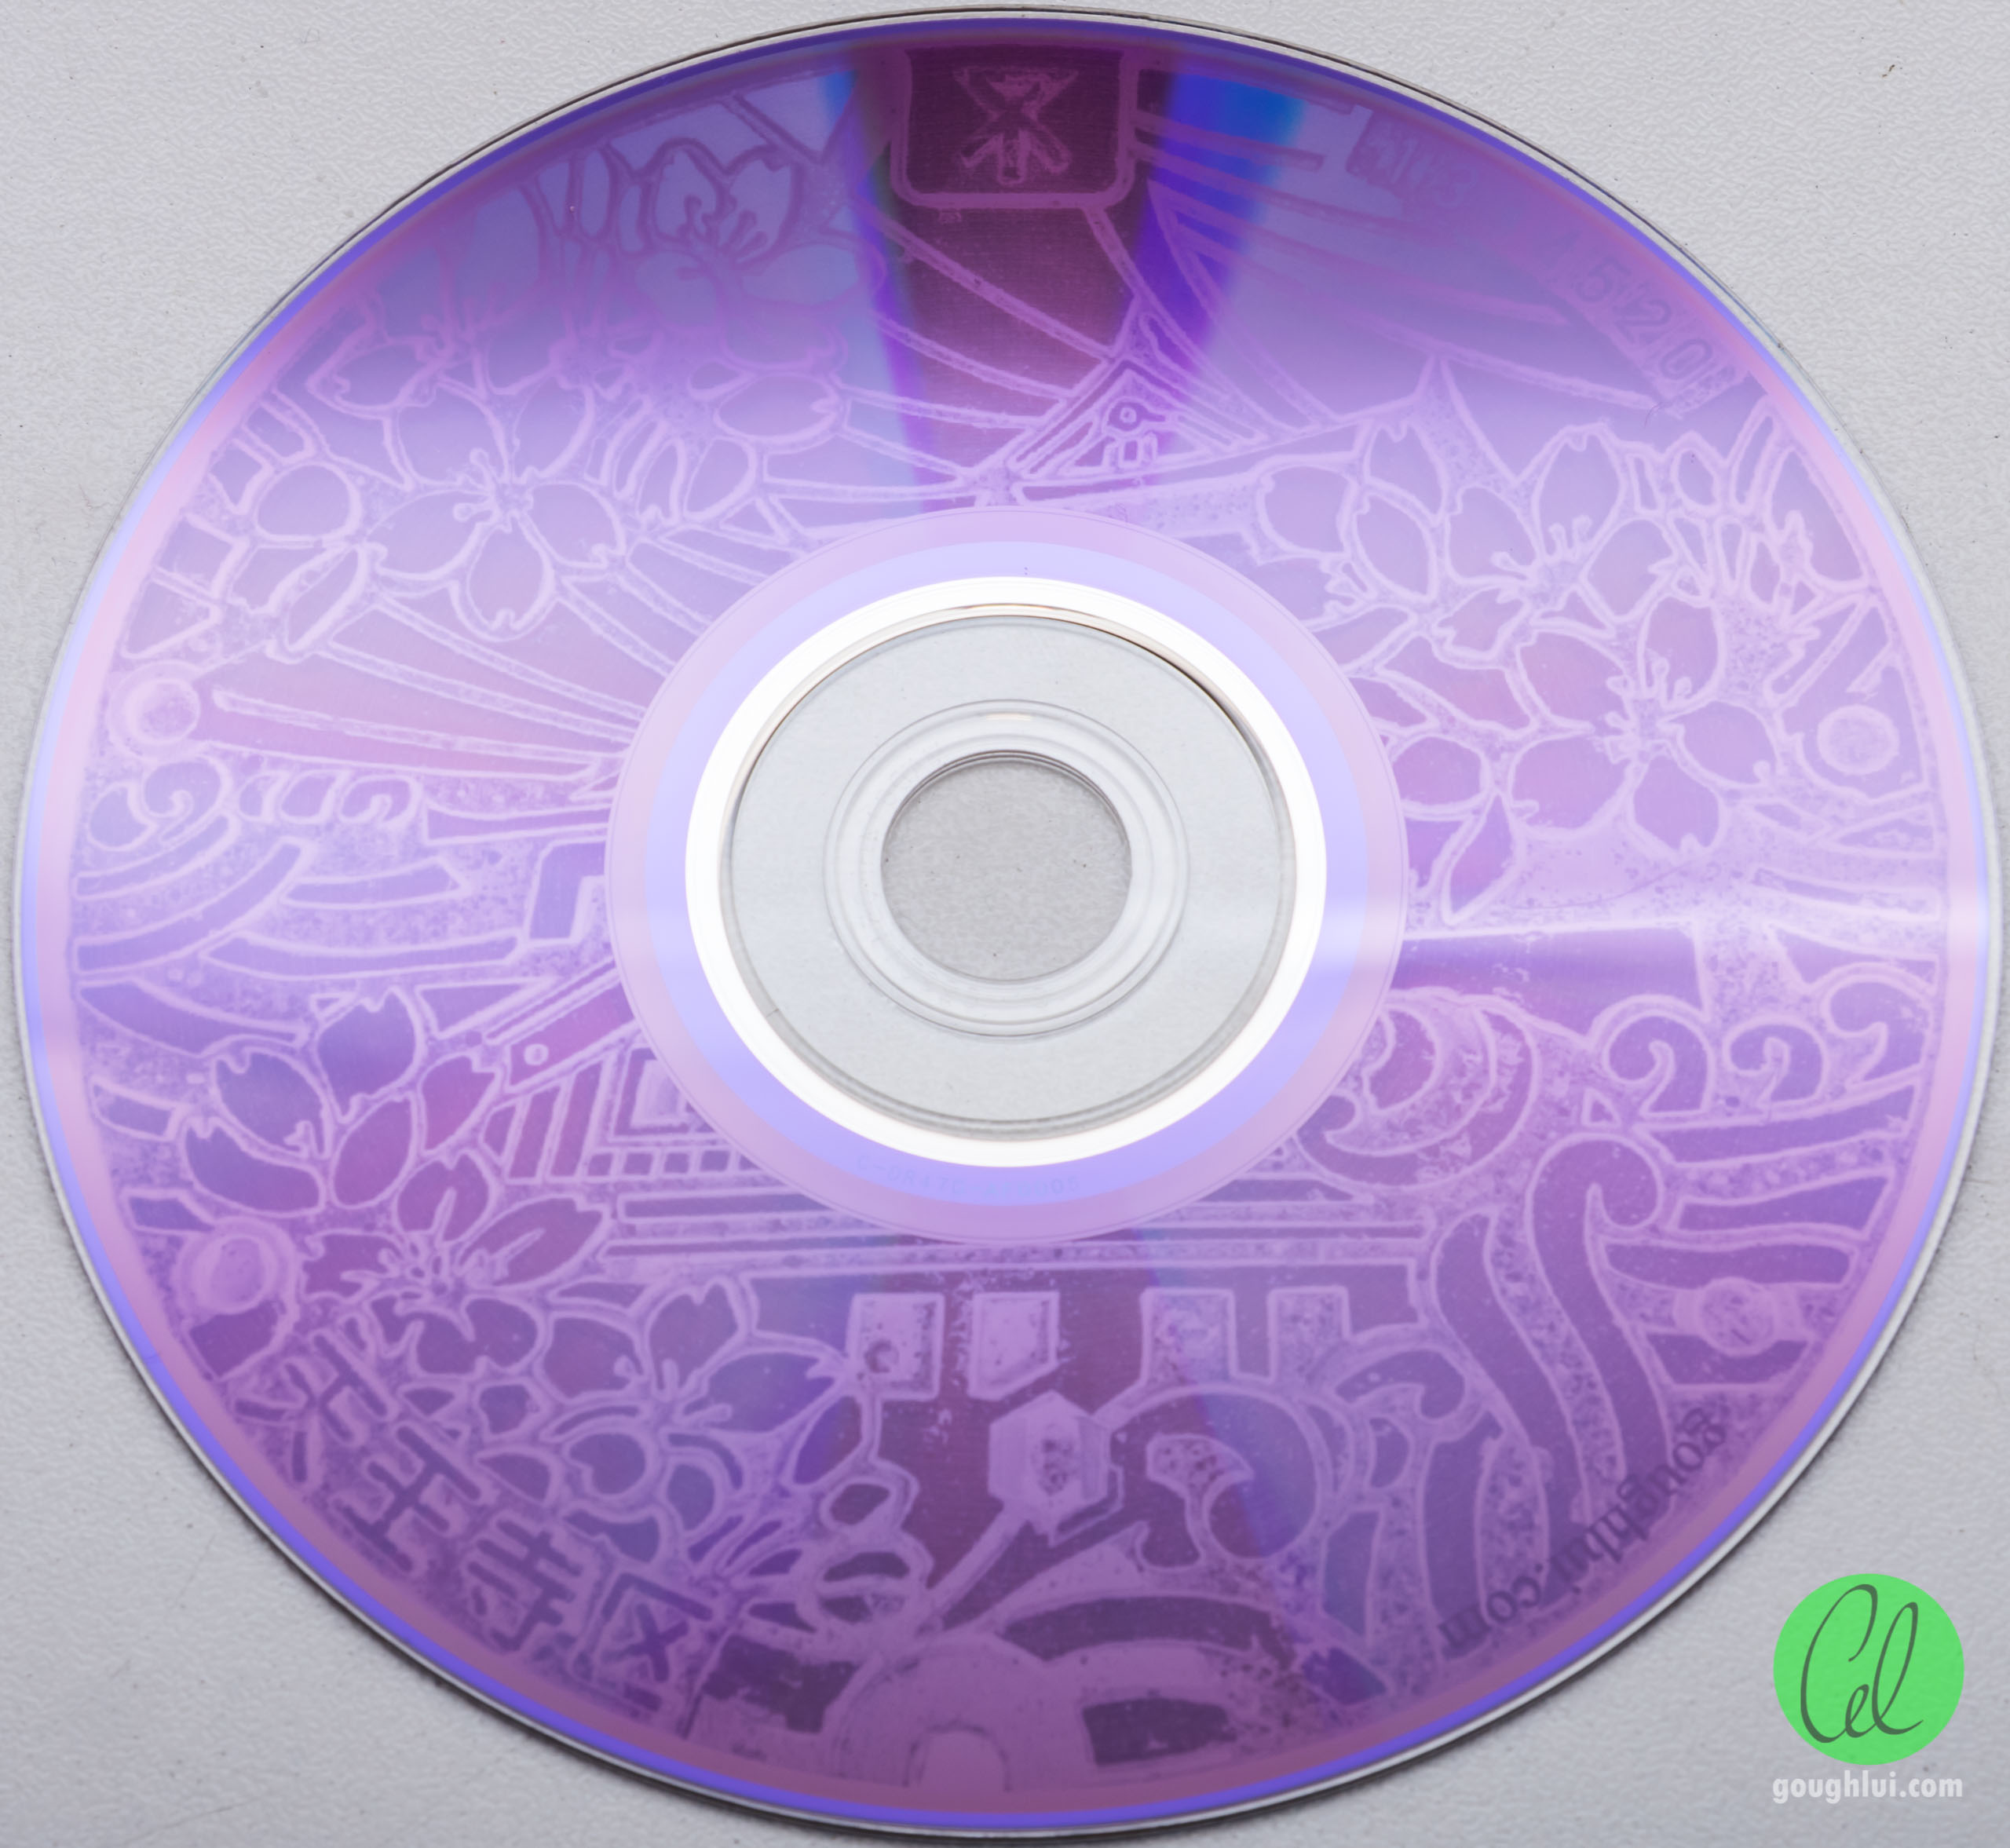
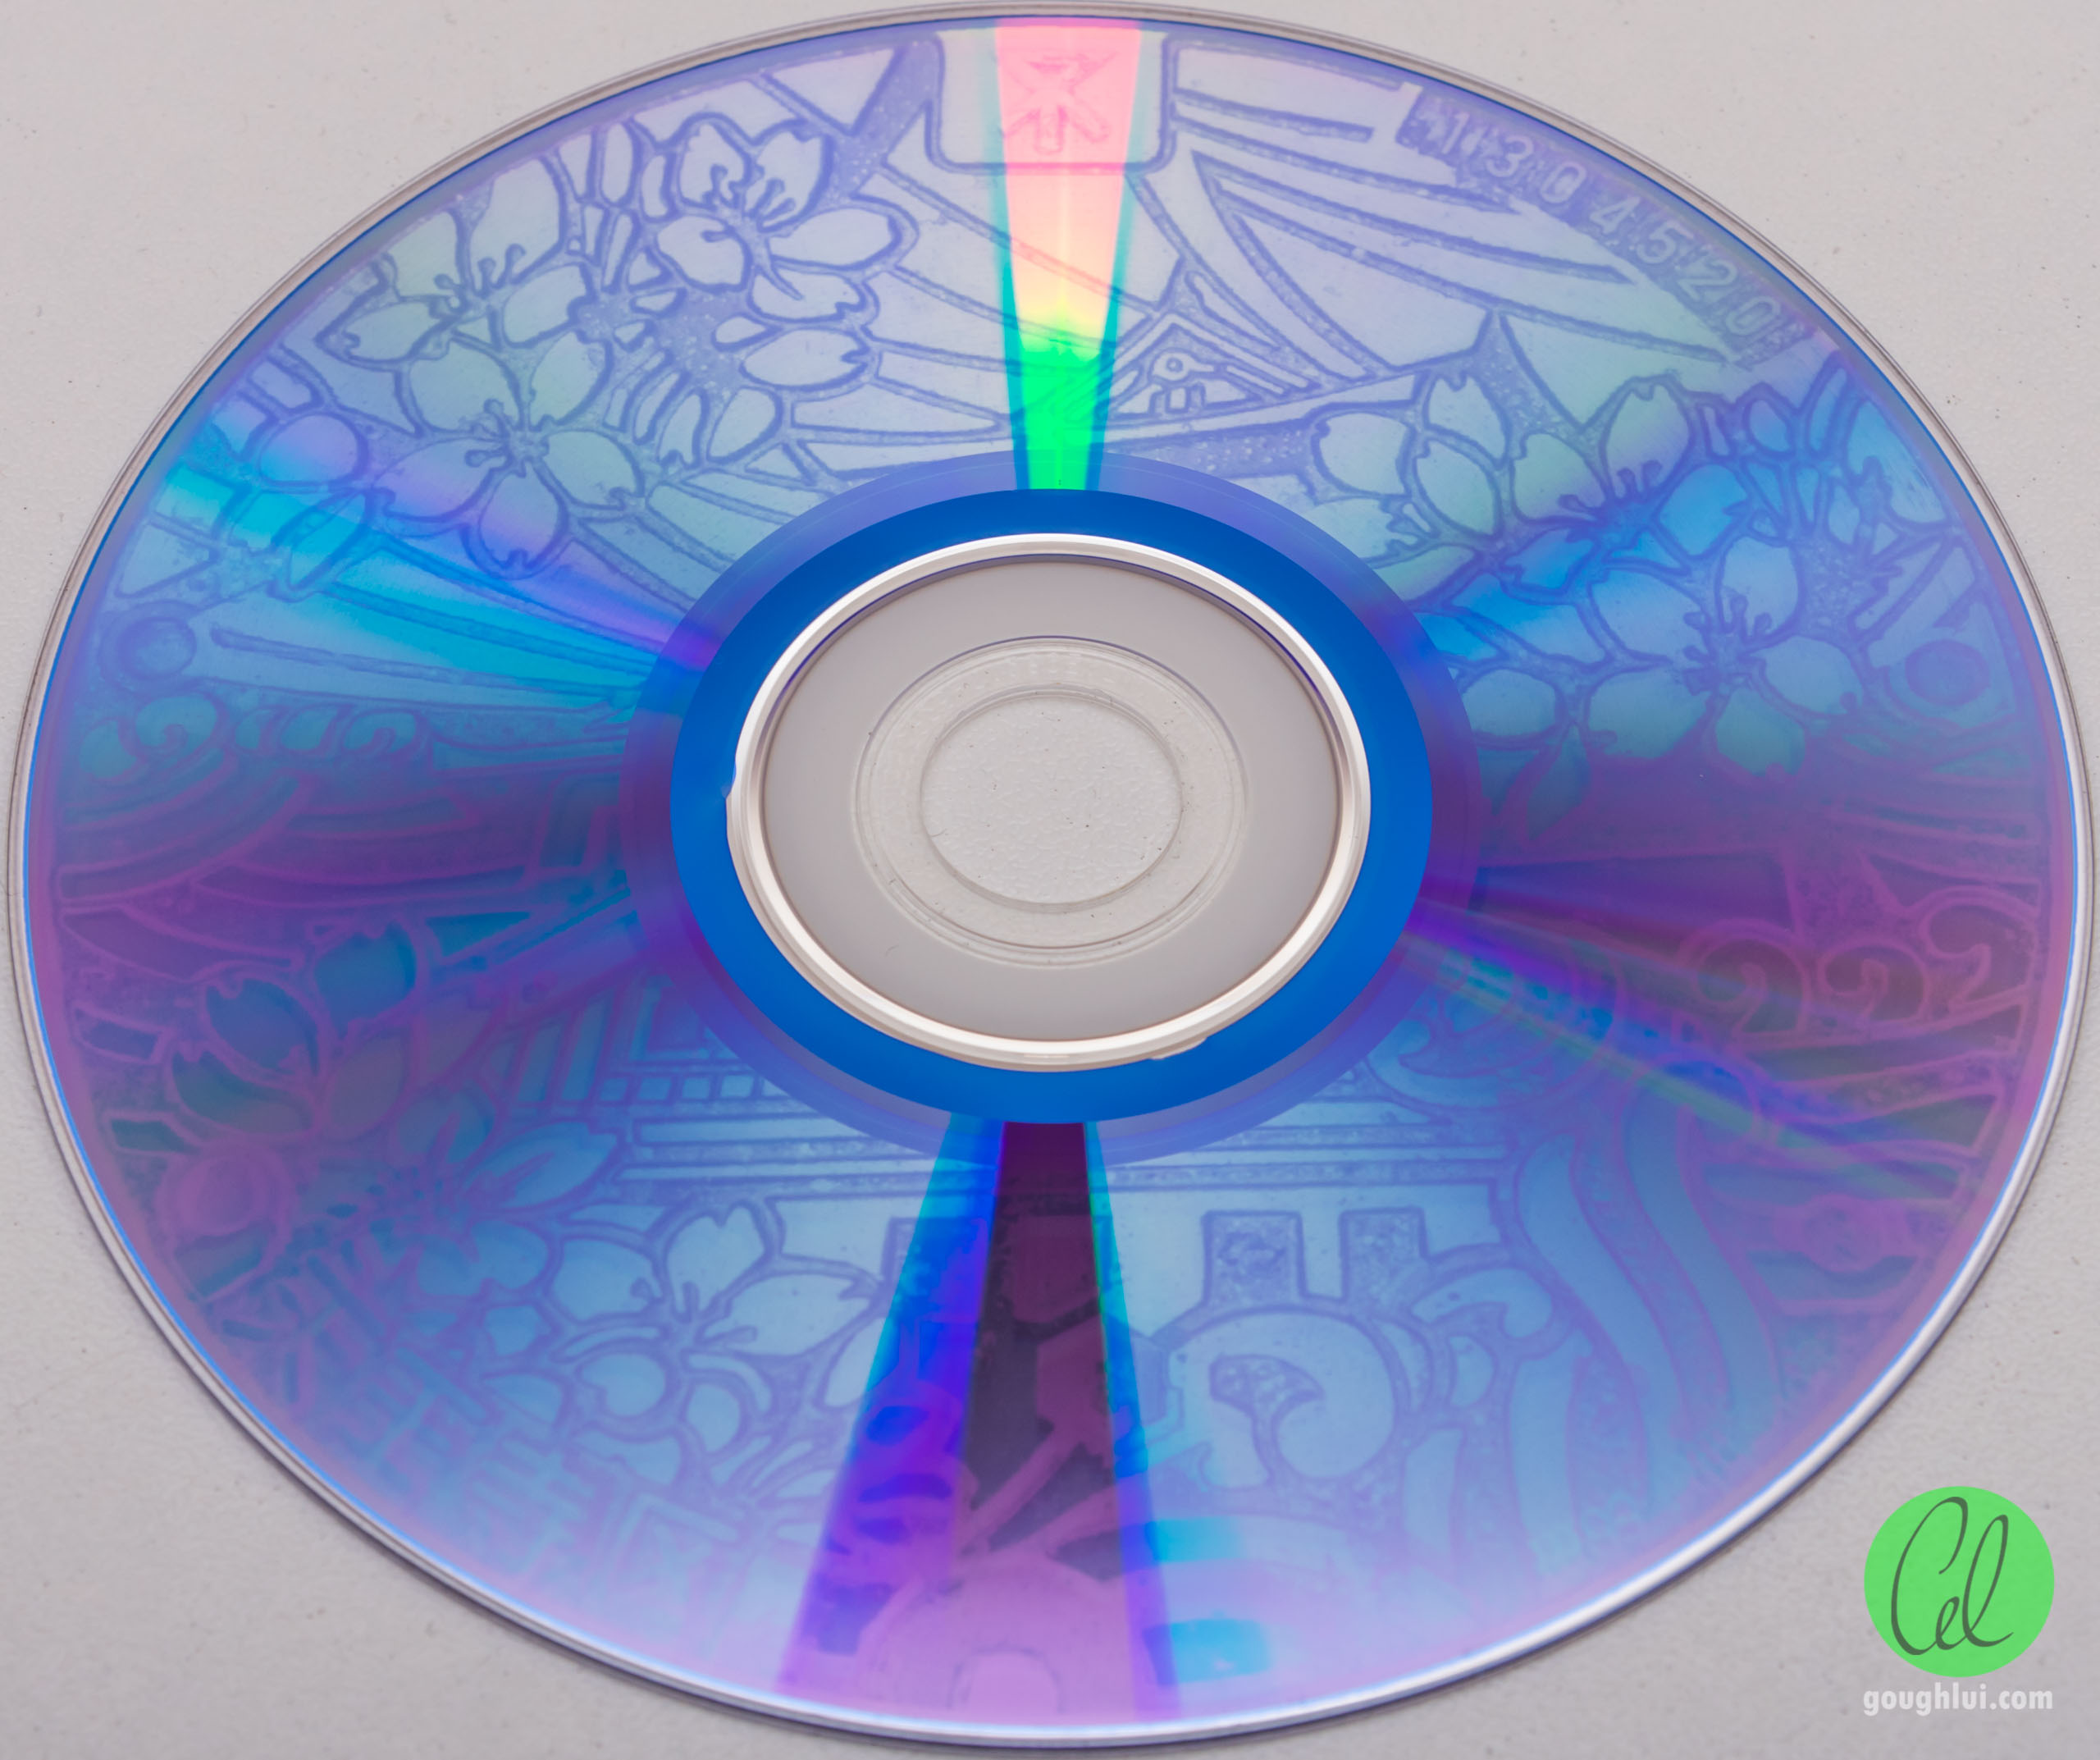
Of course, the type of disc you use matters. This was my image of an Osaka manhole cover from Japan, which I burned onto a disc with Ritek G-like dye at the top and MCC 16x dye on the bottom. The resulting contrast on the G-like dye is quite a bit clearer to the eye than the brighter MCC dye, but each has their own look to it. Unfortunately, unlike CD-Rs, the colour of DVDs is relatively limited to just a few purples and blues, while the DVD-capable drives do not support burning images to CDs.
Competing Technology
The main competitor to Labelflash would be LightScribe, introduced just slightly earlier using a grey-and-gold colour palette and a special “clocking” code in the centre of the disc. This system, developed by HP in 2004, is compatible with both CDs and DVDs and maintains rotational alignment across image burns allowing for an existing image to be added to. This system suffered from issues with fading of the print depending on the storage conditions, and while the media was cheaper and more widely available than Labelflash, still commanded a premium over regular printable-top discs.
LabelTag was LiteOn’s competing version launched with the iHAS524 burner relatively late in 2010, which used a slightly different approach. This one encapsulates the label data in its own disc session, requiring the disc to be burned as a multi-session DVD. By using regular bit patterns, it avoids the potential confusion of a DVD reader when accessing subsequent sessions. This also allows for adding multiple image “tags” to the disc between data sessions, rather than requiring the disc to be closed and burning just one image in the free space. It claims to work on single-layer DVDs offering black and white imaging of 3528 pixels per revolution. There are a few examples of text burned with this drive, although I suspect this approach works poorly with images.
Conclusion
The relevance of optical discs is dwindling over time, as storage requirements have increased and patience has decreased. Labelling discs was a problem that a number of companies tried to solve in different ways. Ultimately, labelling the discs by laser proved to be an unpopular system, in part due to cost but also due to speed and quality limitations. The humble inkjet printer and printable-top discs became the preferred method soon-after the introduction of such technologies.

Labelling by laser did start with Yamaha’s foray into the optical disc drive market, but sadly, that is where they ended. Their featureful and speedy CD-RW drive didn’t earn them a prominent place in the premium CD-RW drive market, which saw them exit soon afterward. It’s sad but it seems Plextor followed the same fate as well and the optical disc industry as a whole seems to have contracted in size.
However, while there might not be that much worth doing with old DVD+/-R media, if you have a Labelflash/DiscT@2 (or LabelTag) capable burner, you could literally burn pictures into the disc and make some sort of art out of it. Pretty frisbees at last!
It’s actually quite easy to add LabelTag to a Lite-On iHAS124/324 or 224/424 A/B/C/D by crossflashing them to the iHAS524 or 624 respectively. Other drives based on the same hardware such as the DH-24ABS and DH-16ACSH also work.
I have all of the files that should be needed for that uploaded here: https://cheapiesystems.com/media/odd-firmware/
Assuming you have a compatible drive, it should just be a case of flashing the correct firmware with Flash Utility and then using the “change checksum” feature in EEPROM Utility to make the light stop flashing. You can of course use other tools instead if you want.
And yes, LabelTag works pretty badly with images… at least it does text well, sort of.
Thanks for the hints – I suspect I probably don’t have any compatible hardware laying around (mainly because I was pretty much “off” Lite-On by that stage), but in case I do, I’ll be sure to give it a go. I was a fan of crossflashes in the early LDW/SOHW series drives – Omnipatcher and MCSE were both very handy. But since then, I’ve really not taken much to the LiteOn drives since I found their DVD-R burns weren’t quite as compatible on some of the drives (due to the lead-in radius being a bit further out) especially those based on Philips chipsets and the burn quality/media compatibility trailed the Pioneers and NEC/Optiarcs of the time. Of course, they were still good fun as PI/PO scanning drives.
I guess I’ll have to rummage around …
– Gough