How to use Network Rendering with Maxwell Render

Maxwell Render is a physically accurate, unbiased engine, developed by Next Limit Technologies in Madrid, Spain. This standalone software is used in the film, animation, and VFX industry, as well as in architectural and product design visualization. Maxwell Render offers various plug-ins for 3D/CAD and post-production applications: Maya, Houdini, 3ds Max, Cinema 4D, Revit, After Effects, etc.
In high-end productions, it is often necessary to distribute a render job over several machines on a farm to quickly obtain all the frames needed for a sequence or to calculate a very large image. Maxwell Render’s networking capabilities are very powerful (more computers equals more speed in a very linear way), and very flexible – networking is multi-platform allowing a mixture of Windows, Mac and Linux systems to be connected. The software’s wizard system makes setting a network job a straightforward task. With the network rendering, you can tell Maxwell to render the same image on all your computers (cooperative rendering), or each computer can render one frame of an animation.
Network Rendering Introduction
The Network System is composed of three components:
- The Manager: it is the server computer that distributes the jobs between the available render nodes. It also merges the images in a cooperative render.
- The Monitor: interface where you add jobs, assign jobs to nodes, stop a network render, display info about the current job and show a merged preview of a network render in progress.
- The Render Nodes: the slave computers that actually render the frames.
With these three components, the Network System allows you to:
- Launch a cooperative render with several machines working together to render the same image. The contributions of the machines are merged into a single image.
- Launch a non-cooperative render queue, distributing the MXS scenes among the available CPUs, but every CPU renders an independent image. Each machine works on its own MXS scene.
- Launch an animation, distributing the frames among the CPUs in the farm to get the whole frame range.

Setting up Maxwell Network Rendering
Step 1. Install Maxwell
Install Maxwell on all machines and make sure that Maxwell is properly licensed on each of them.
Step 2. Launch Manager and the Nodes
Launch the Manager.exe on the computer that is going to run as Maxwell Manager, and launch Maxwell Render Node in the computers that are going to work as nodes. You can also run a node on the computer that is running the Manager. It can manage the network rendering and also contribute to the rendering process. Only one Manager is allowed to run simultaneously on the network.
Step 3. Launch Monitor
Launch the Monitor on the computer where you want to control (launch/ display/ stop) the rendering process. The Monitor will automatically connect to the network to search for the Manager and the available Nodes. They will be listed in the Nodes panel. The Monitor can run on the same computer that is running the Manager. Check in the Monitor>Nodes panel that all your computer nodes are listed there. If some of them are not listed, check the firewall settings on that computer and make sure it is not being blocked.
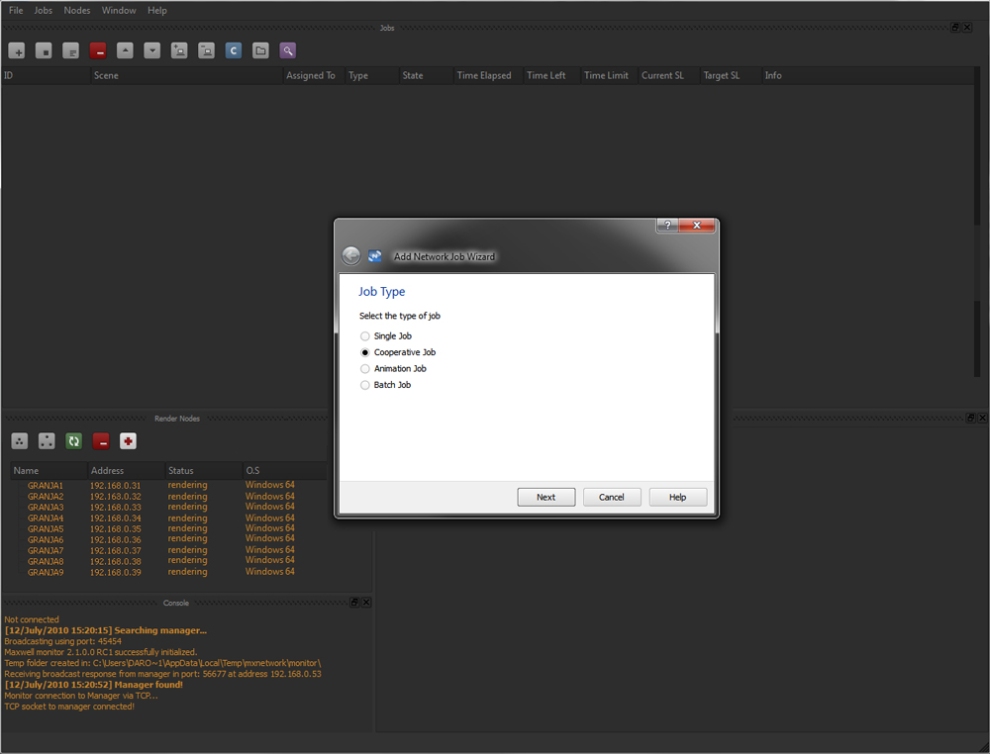
Step 4. Add a job
Use the Add Job button to submit a job. This will open the Add Job Wizard to help you through the process. Select one of the following options.
- Single job: to make a non-cooperative render queue with each node working on an independent frame.
- Cooperative job: several computers work on the same image, which will be merged at the end of the process.
- Animation job: select a scene and the frame range, and the frames will be distributed among the available nodes. You can also render single frames from the same sequence by using a semi-colon “;” when typing. For example: 1-10;12;20-23. This will render frames 1 through 10, frame 12, and finally frames 20 through 23. Any padding number is allowed.
- Batch job: This option allows you to select multiple MXS scenes to be rendered. All the scenes are rendered using their own settings and output paths. You can perform changes in the rendering settings (render time, SL, resolution, camera, etc), and these changes are applied to all the scenes added. An interesting feature is that in this mode you can choose the Batch Type, between Cooperative type (all render nodes work together in the same scene before starting with another) or Single type (each render node renders a scene separately).
Once you have selected the job type you are submitting, you can change the details.
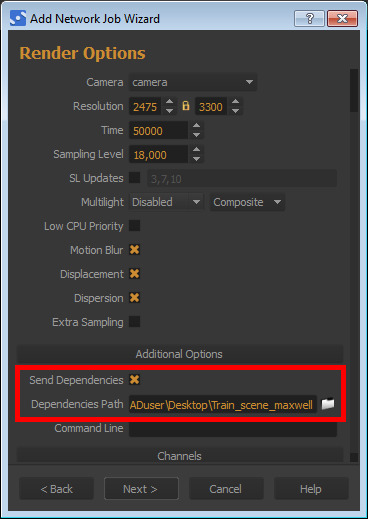
Step 5. Specify output paths and render settings
You have two options of specifying the output paths of your renders:
- UNC format: this is the safest way to write the output paths. The paths are specified as a network path and the Manager can in this case save the files on any computers shared folder that is part of your network. The network path is written in the format of \\computername\myfolder\myrender.png (where “myfolder” is a shared folder on the network).
- As standard local paths: if you specify a local path to a folder, the folder needs to be in the same computer that is running the Manager. The Add Job wizard will give you a warning that the paths are not network paths, but you can ignore this if the output folder is in the same computer that is running the Manager.
You should always specify both the image output and the MXI output paths. If the paths are the same, you can simply drag & drop the folder icon of one path over the folder icon of the other path to quickly copy it.

If you do not have network paths, enable “Send dependencies” to send each Render Node the required textures and extra files. Otherwise, you must specify here a UNC path to a networked folder to which all nodes have access.
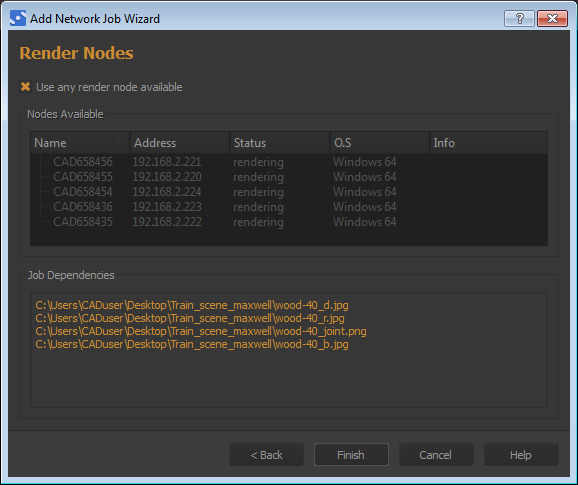
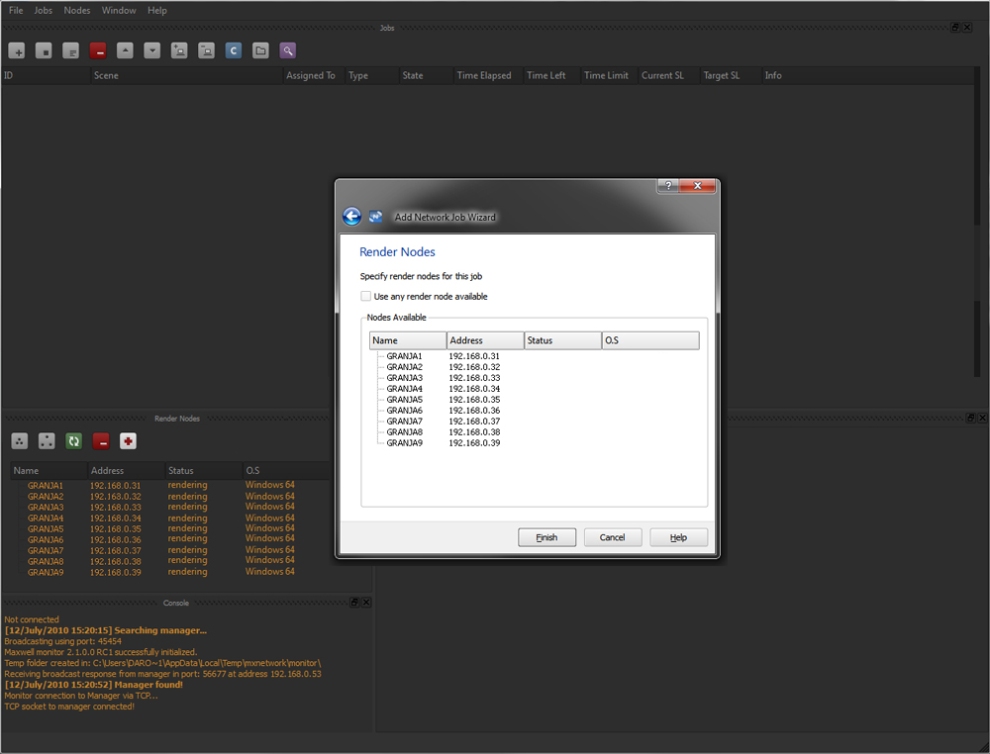
Step 6. Specify the render nodes
You can even choose which nodes will work on each specific job. Enabling the “Use any render node available” makes Maxwell assign the job to the first node that it finds available on the network.
Using Maxwell Network Rendering at iRender Cloud Render Farm
iRender, a Vietnamese-based software company, provides high computing performance on the model of IaaS (Infrastructure-as-a-Service), with thousands of CPUs & GPUs for 3D rendering, processing Big Data or any other intensive tasks. We provide CPU Server and 6 GPU Cloud Rendering packages with 1/2/4/6 card(s) RTX 2080Ti/3080/3090, which suit all your project demands and will speed up your rendering process many times. Maxwell users can easily choose their machine configuration from recommended system requirements to high-end options.
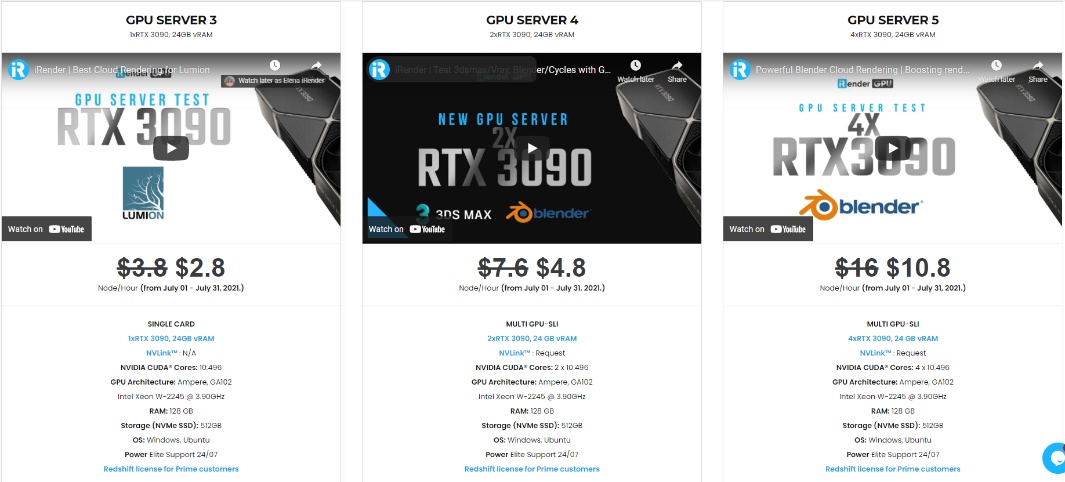
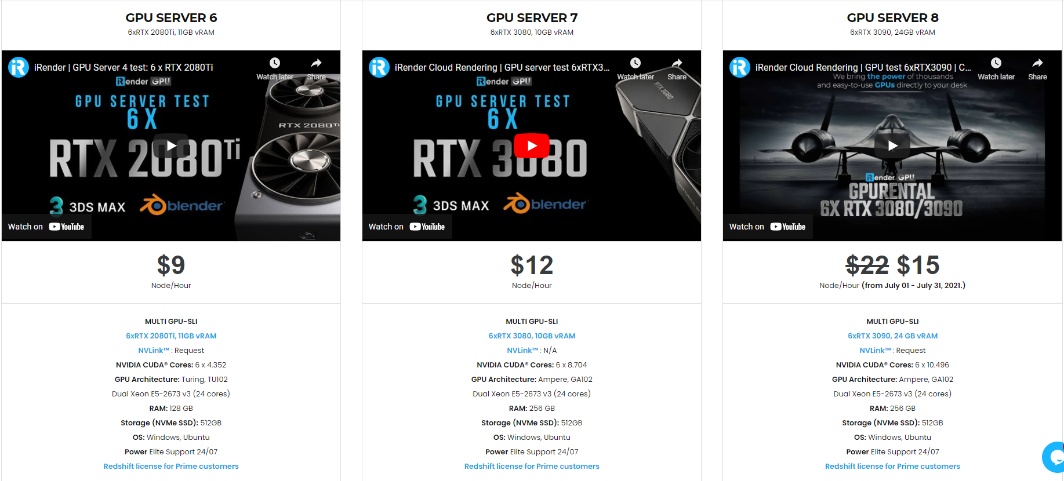
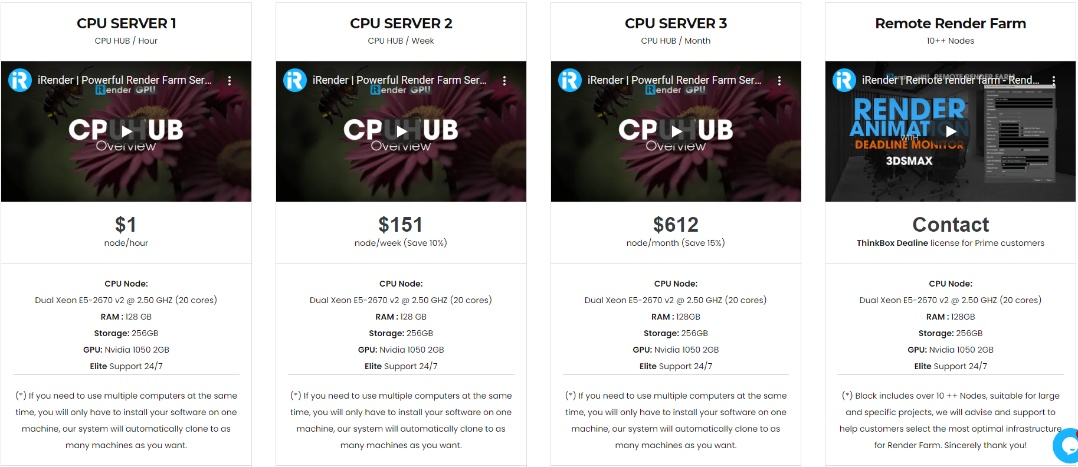
To reduce the rendering time, Maxwell users can run multiple machines at the same time, separately, or connect them with network rendering. CPU server with moderate configuration and a very cheap price will be the most suitable package for network rendering, but of course, you can use GPU servers if you want to reduce the time even more.
Let’s see rendering tests with Maxwell on server 6 (6x RTX 2080Ti), server 7 (6x RTX 3080) and server 8 (6x RTX 3090) at iRender:


In addition, you will enjoy more benefits than just the powerful machines.
1. Free and convenient transferring tool
iRender offers a powerful and free file transfer tool: Gpuhub Sync. With fast file transfer speed, large data capacity, and completely free. You can transfer all the necessary data into our Gpuhub Sync tool at any time without connecting to the server. The data will be automatically synchronized in the Z drive inside the server, ready for you to use.
2. Flexible price
You will be charged on a per-minute basis. However, you can always save up to 50% with our Fixed Rental feature. For those who are in need of the server for more than a day, or have extremely large projects, we advise choosing daily/weekly/monthly or even yearly rental packages. The discount is attractive (20% for daily packages, 40% for weekly and monthly packages, 50% for yearly packages). Besides, you don’t have to worry about over-charging if you forget to shut down the server.
3. Real human 24/7 support
Our support is always online 24/7, helping you to handle the problem quickly, effectively, saving you both time and money.
Conclusion
With the above advantages and the machine configuration package that iRender offers, we believe that Maxwell users will have the most comfortable, quickest, and most effective rendering time.
So, do not hesitate anymore, let’s REGISTER for an account today to get a FREE COUPON to experience our service and reach a new level of cloud rendering. Or contact us via WhatsApp: +(84) 912875500 for advice and support.
Thank you & Happy Rendering!
Source: Maxwell Documentation
Related Posts
The latest creative news from Maxwell Cloud Rendering , Cinema 4D Cloud Rendering , 3D VFX Plugins & Cloud Rendering.